Note
Access to this page requires authorization. You can try signing in or changing directories.
Access to this page requires authorization. You can try changing directories.
In this quickstart, you learn how to deploy the events feature in the Azure portal to send FHIR® and DICOM® event messages.
Prerequisites
Before you begin the steps to deploy the events feature, complete the following prerequisites.
- An active Azure account. If you don't have an Azure subscription, create a free account.
- Microsoft Azure Event Hubs namespace and an event hub deployed in the Azure portal
- Workspace deployed in the Azure Health Data Services
- FHIR service deployed in the workspace or DICOM service deployed in the workspace
Deploy events
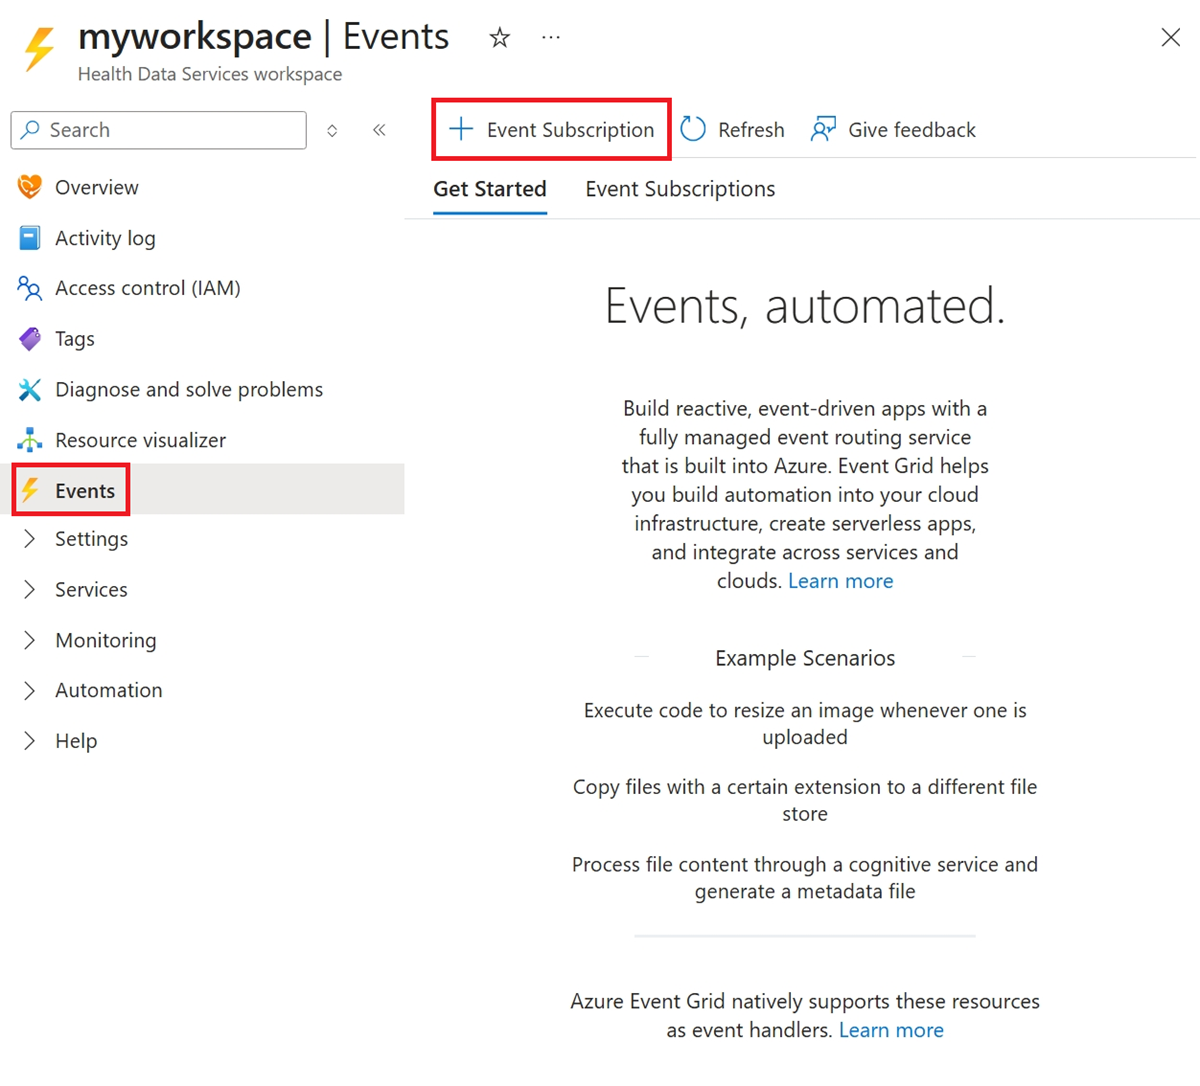
Browse to the workspace that contains the FHIR or DICOM service you want to send event messages from.
Select Events on the left menu. Then select + Event Subscription on the toolbar.
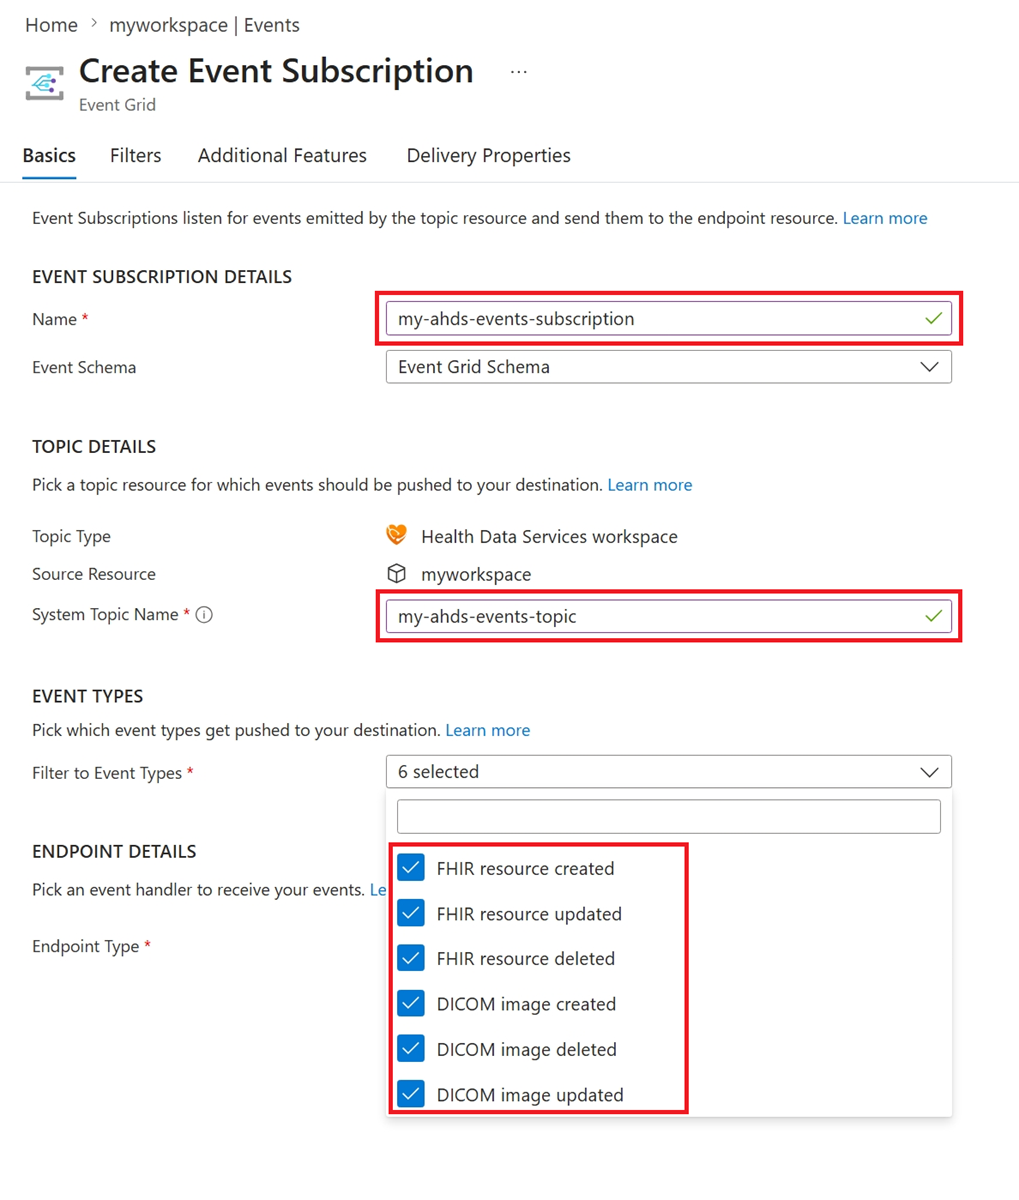
Name: Enter a name for your event subscription.
System Topic Name: Enter a name for your system topic.
Note
The first time you set up the events feature, enter a new System Topic Name. After the system topic for the workspace is created, use the System Topic Name for any additional event subscriptions that you create within the workspace.
Event types: Select the type of FHIR or DICOM events to send messages for, such as create, updated, and deleted.
Endpoint Type: Select Event Hub.
Endpoint: Select Configure an endpoint.
Select the Event Hub Namespace and Event Hub.
Select Confirm selection.

Note
For this quickstart, use the default values for the Event Schema and the Managed Identity Type settings.
Select Create.


Event messages aren't sent until the Event Grid System Topic deployment successfully completes. Upon successful creation of the Event Grid System Topic, the status of the workspace changes from Updating to Succeeded.


After the subscription is deployed, it needs access to your message delivery endpoint.

Tip
For more information about providing access by using an Azure Managed identity, see Assign a system-managed identity to an Event Grid system topic and Event delivery with a managed identity.
For more information about managed identities, see What are managed identities for Azure resources.
For more information about Azure role-based access control (Azure RBAC), see What is Azure role-based access control (Azure RBAC).
Next steps
In this quickstart, you learned how to deploy events by using the Azure portal.
To learn how to enable the events metrics, see
To learn how to export Event Grid system diagnostic logs and metrics, see