Note
Access to this page requires authorization. You can try signing in or changing directories.
Access to this page requires authorization. You can try changing directories.
This article describes how to get events from an Azure event hub into Real-Time hub.
Prerequisites
- Access to a workspace in the Fabric capacity license mode or trial license mode with Contributor or higher permissions.
- Appropriate permission to get an event hub's access keys. If your event hub is within a protected network, connect to it by using a managed private endpoint. Otherwise, ensure that the event hub is publicly accessible and not behind a firewall.
Navigate to Add data page
Sign in to Microsoft Fabric.
If you see Power BI at the bottom-left of the page, switch to the Fabric workload by selecting Power BI and then by selecting Fabric.
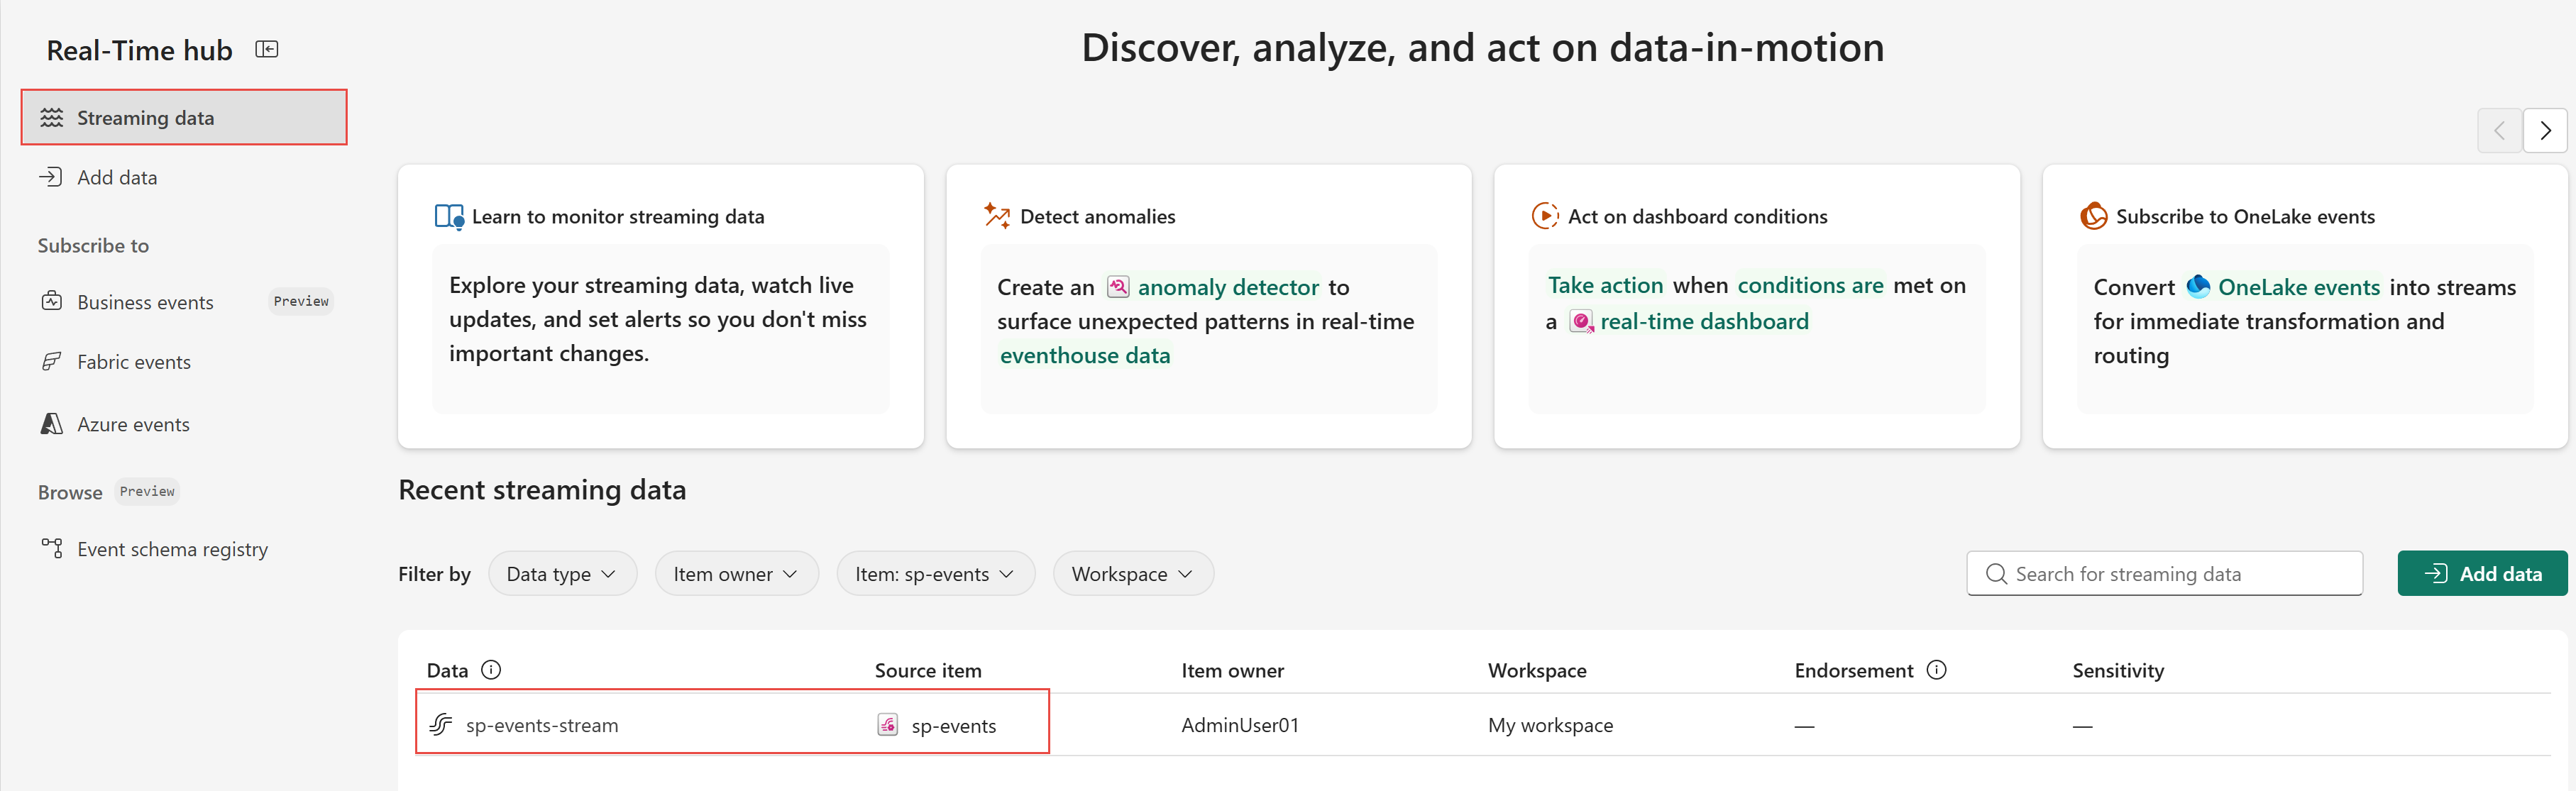
Select Real-Time on the left navigation bar.

The Streaming data page opens by default. Click on the Add data button to get to the Add data page.
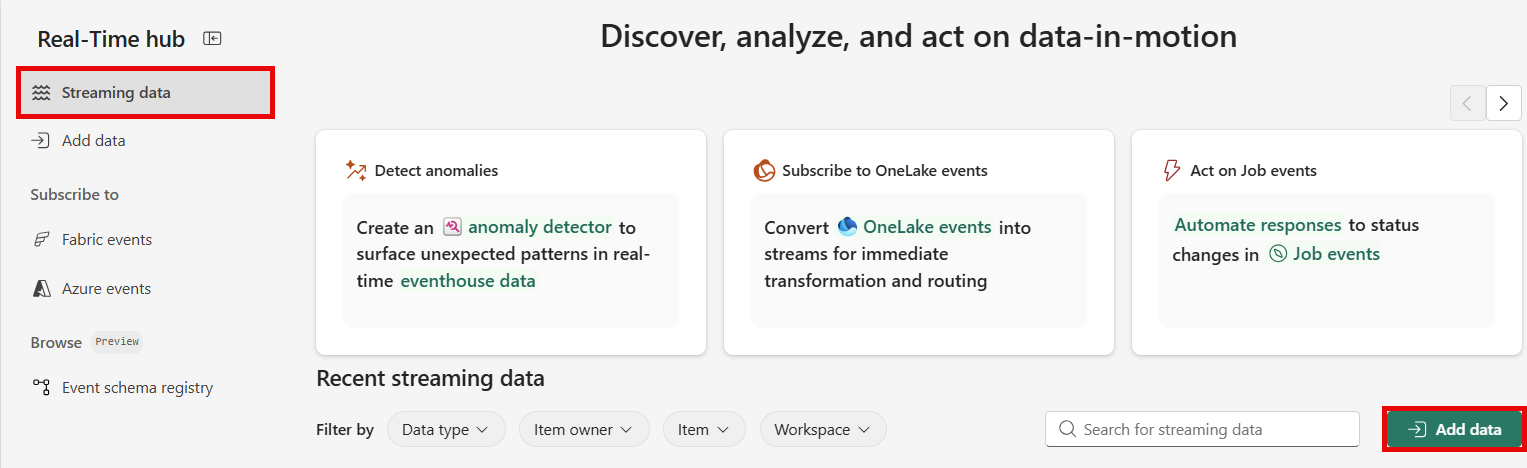
You can also get to the Add data page directly by selecting the Add data option in the left navigation bar.
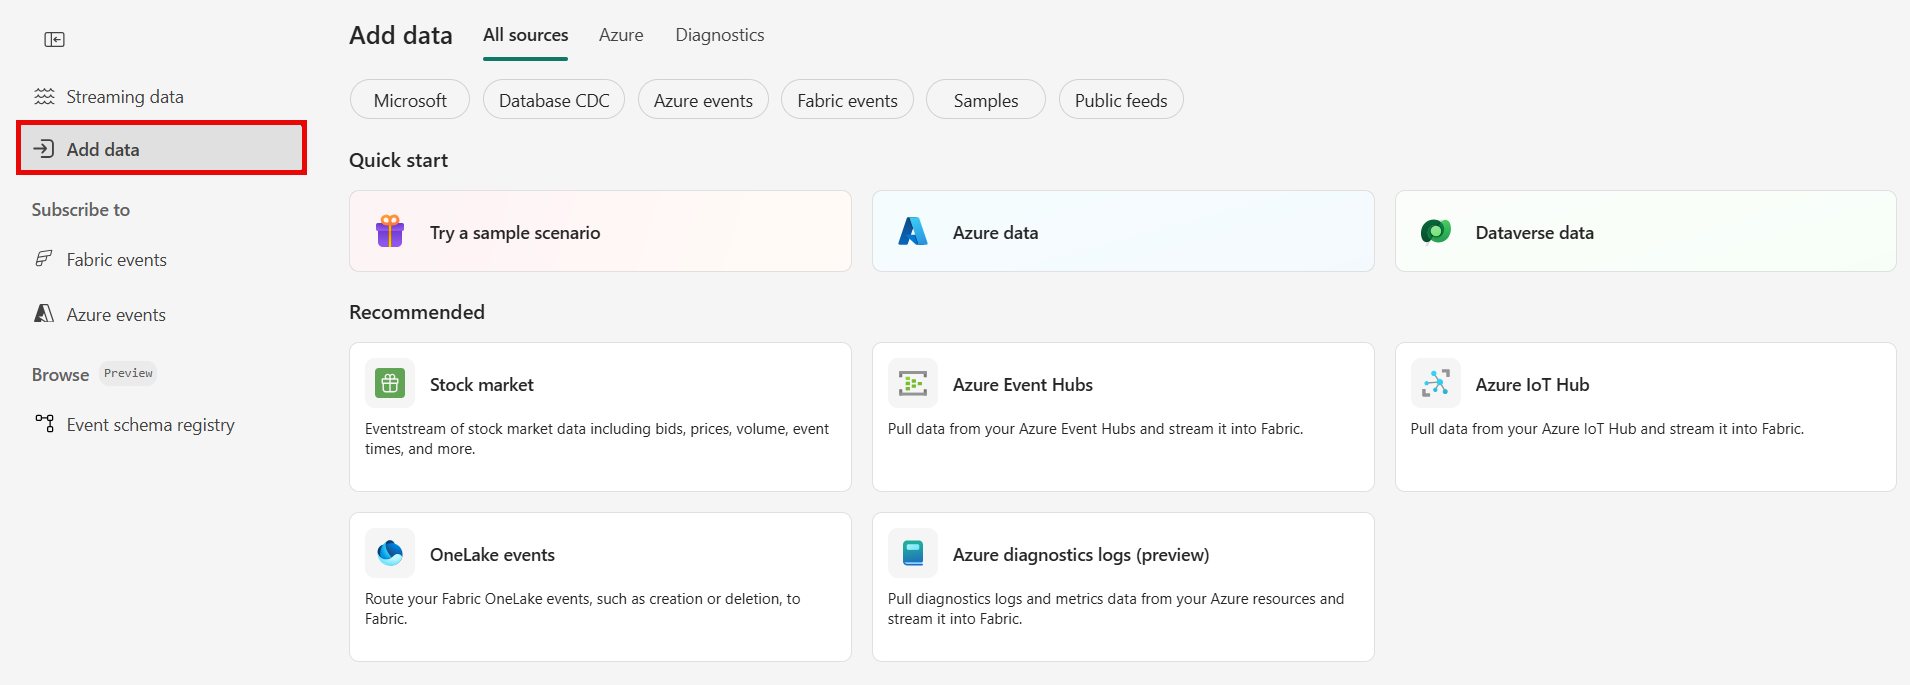


On the Add data, you can connect to an Azure event hub using the All sources tab or the Azure tab (recommended). This article covers both ways to connect to an Azure event hub.
Use the Azure tab to connect to an event hub (recommended)
On the Add data page, switch to the Azure tab.

Hover the mouse over your Azure Event Hubs namespace in the list, and select the Connect button that appears. Alternatively, you can select ... and then Connect from the dropdown menu.
Use the search bar to quickly find your Event Hubs namespace if you have many Azure resources (or) use filters to filter the list by source type (Azure Event Hubs namespace), subscription, resource group, or region.

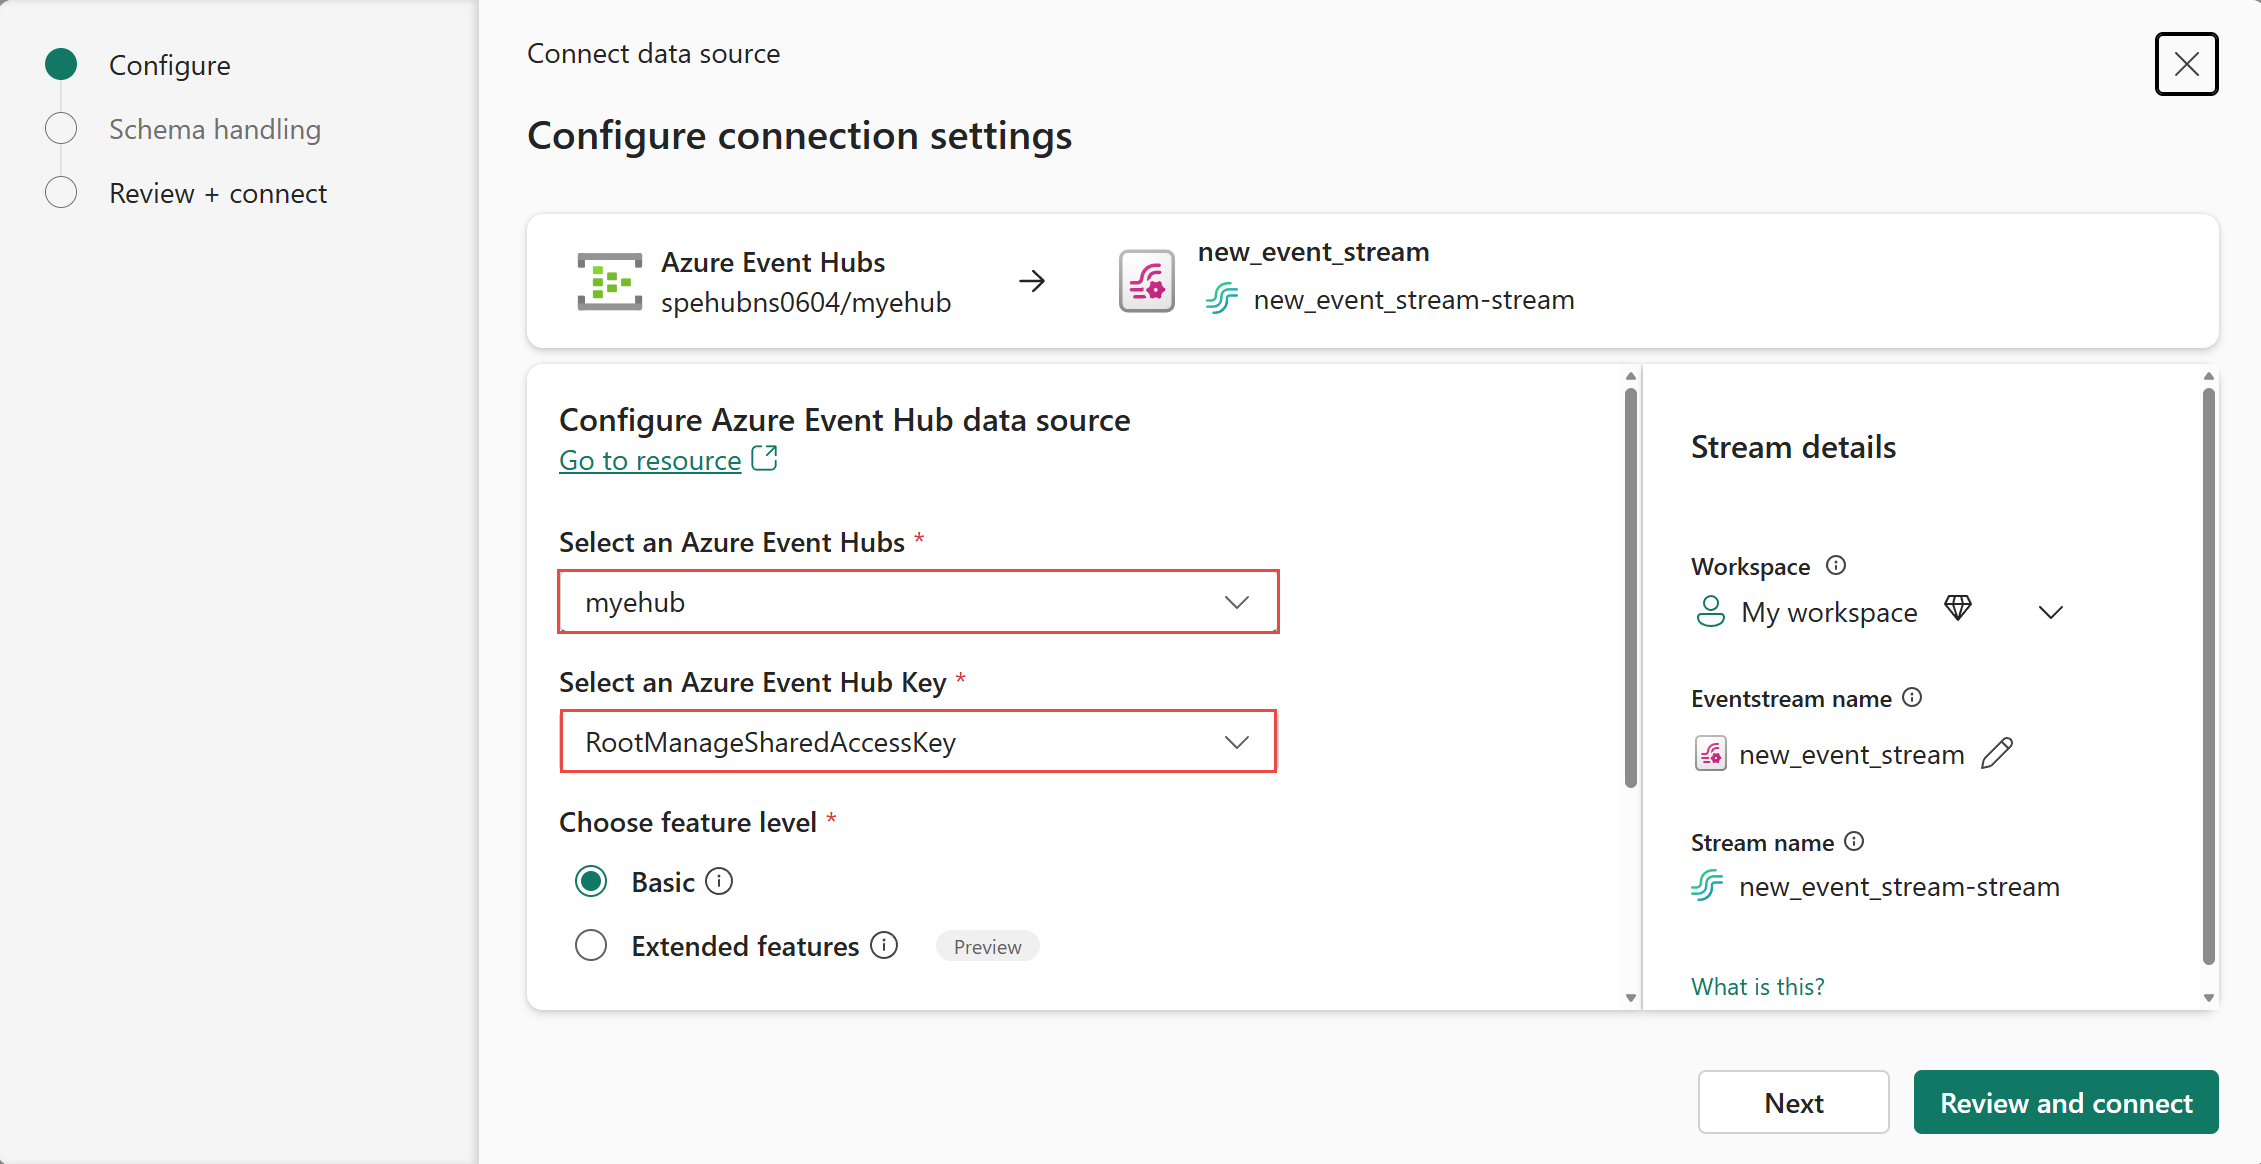
In the Connect data source wizard, on the Configure page, follow these steps:
Select an event hub from the dropdown list. The dropdown is populated with event hubs from the selected Azure Event Hubs namespace.
Select they key name from the dropdown list. The dropdown is populated with key names from the selected event hub.
For Consumer group, select $Default or enter the name of a custom consumer group that you have set up for this event hub.
For Data format, select the format of the events in your event hub (for example, JSON, Avro, etc.).
In the Stream details section to the right, follow these steps:
Select the Fabric workspace where you want to create the eventstream.
For Eventstream name, select the Pencil button, and enter a name for the eventstream.
The Stream name value is automatically generated for you by appending -stream to the name of the eventstream. This stream appears on the real-time hub's All data streams page when the wizard finishes.
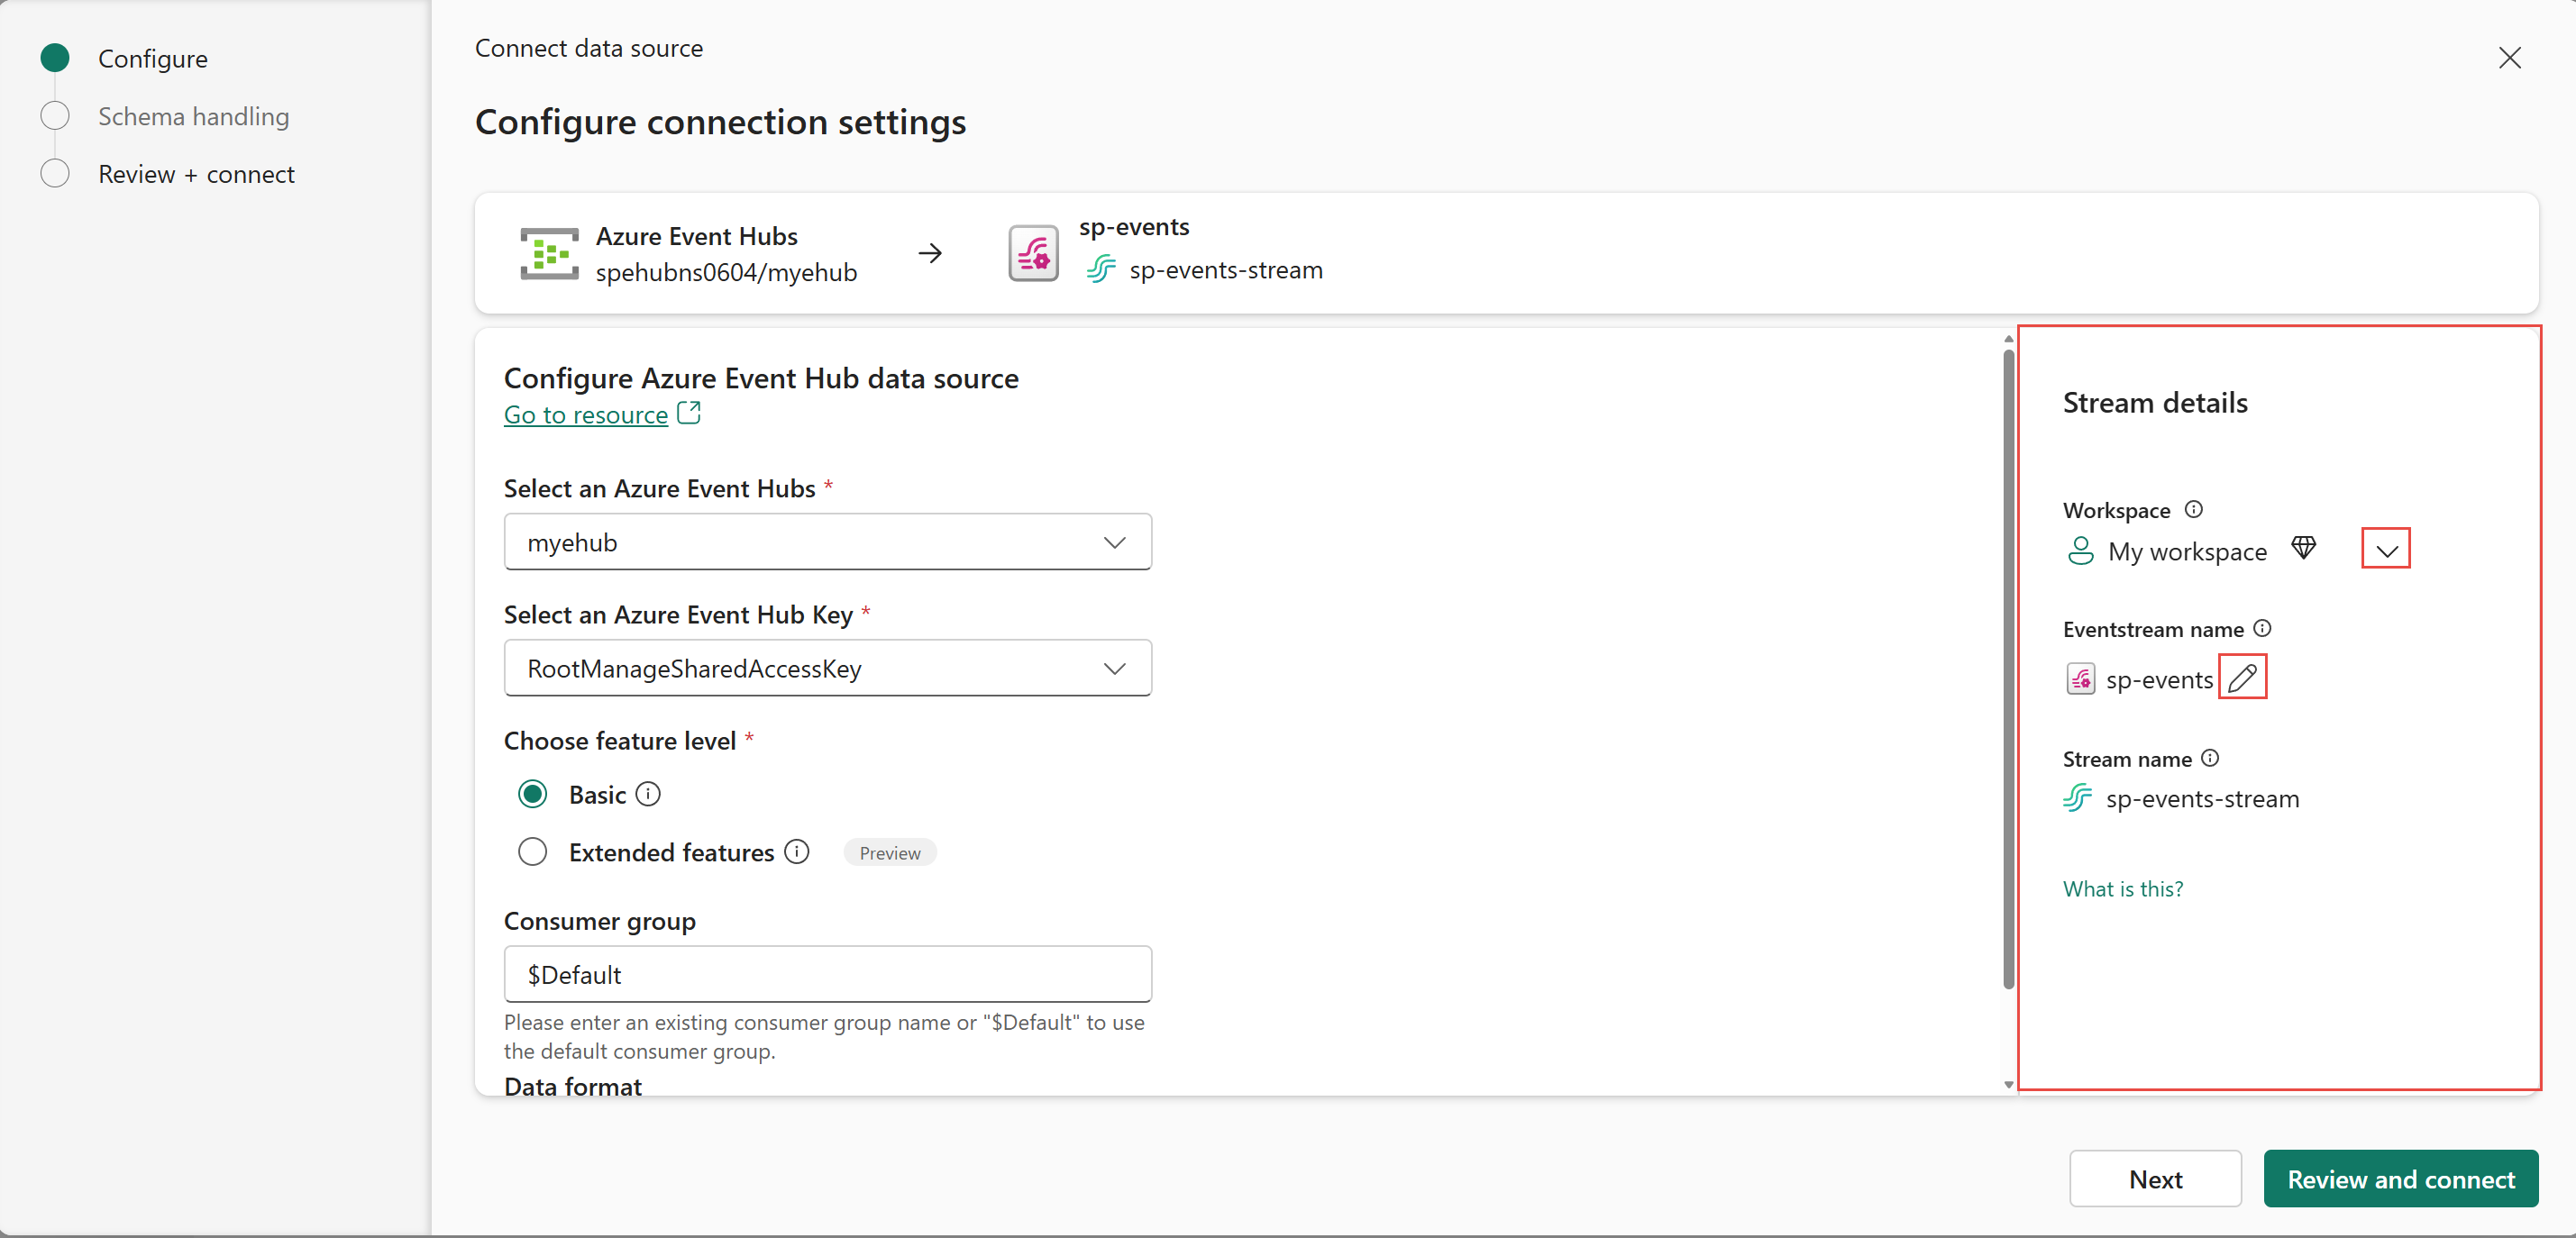
Select Review and connect at the bottom of the Configure page.
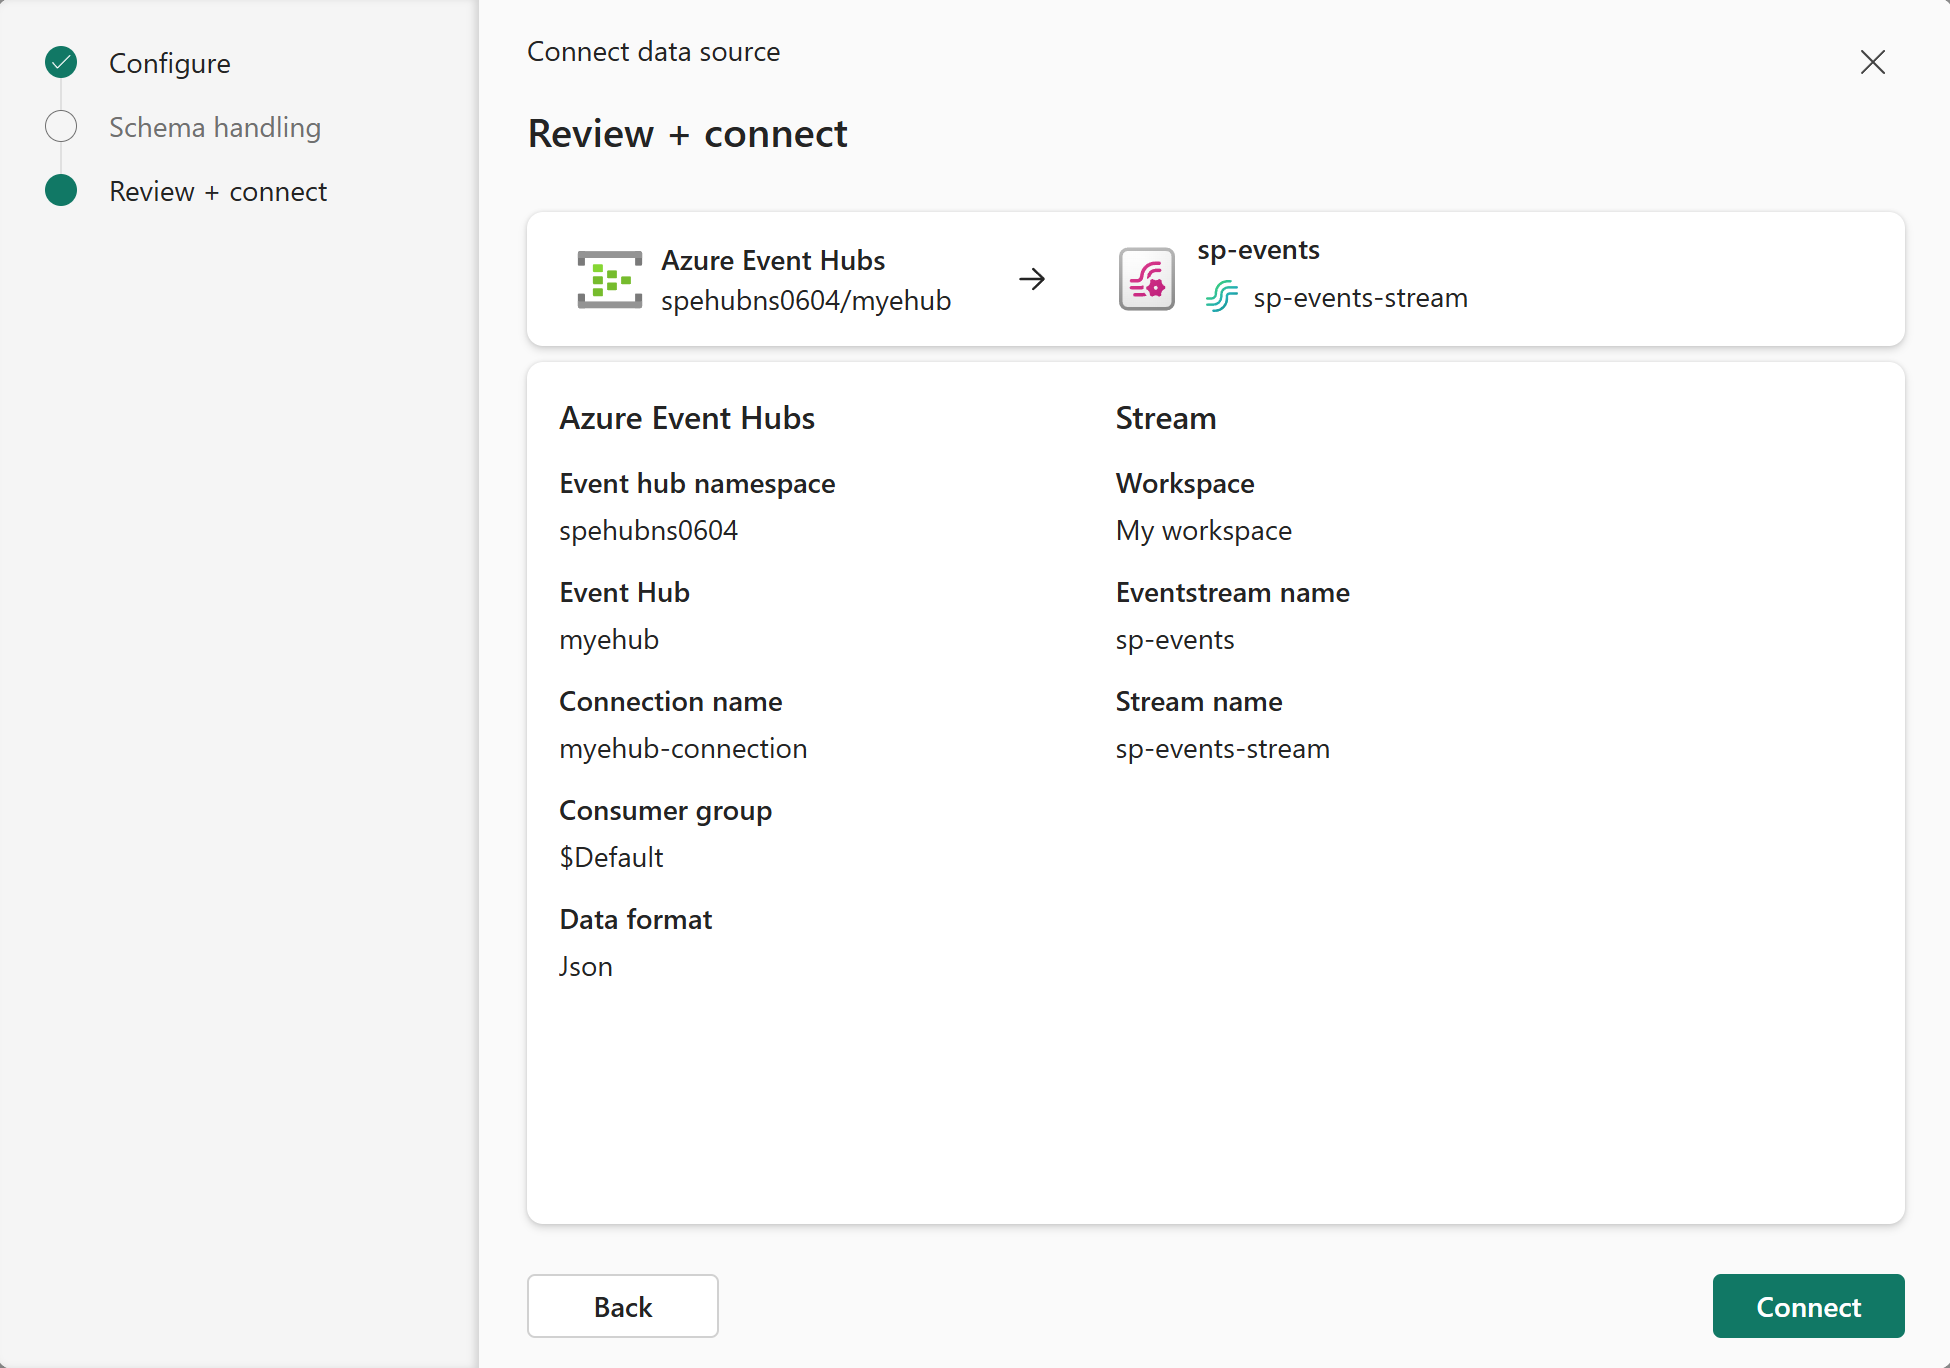
Review the details on the Review + connect page, and then select Connect.


On the Add data page, switch to the Azure tab.
Hover the mouse over your Azure Event Hubs namespace in the list, and select the Connect button that appears. Alternatively, you can select ... and then Connect from the dropdown menu.
Use the search bar to quickly find your Event Hubs namespace if you have many Azure resources (or) use filters to filter the list by source type (Azure Event Hubs namespace), subscription, resource group, or region.
In the Connect data source wizard, on the Configure page, follow these steps:
Select an event hub from the dropdown list. The dropdown is populated with event hubs from the selected Azure Event Hubs namespace.
Select they key name from the dropdown list. The dropdown is populated with key names from the selected event hub.
For Feature level, select Extended features.
- For Consumer group, select a consumer group from the dropdown list. The dropdown is populated with consumer groups from the selected event hub.
- For Starting position, select the point from which you want to start ingesting events. You can choose to start from the earliest available event, the latest event, or a specific point in time.
In the Stream details section to the right, follow these steps:
Select the Fabric workspace where you want to create the eventstream.
For Eventstream name, select the Pencil button, and enter a name for the eventstream.
The Stream name value is automatically generated for you by appending -stream to the name of the eventstream. This stream appears on the real-time hub's All data streams page when the wizard finishes.
Select Next at the bottom of the Configure page.
Schema handling page
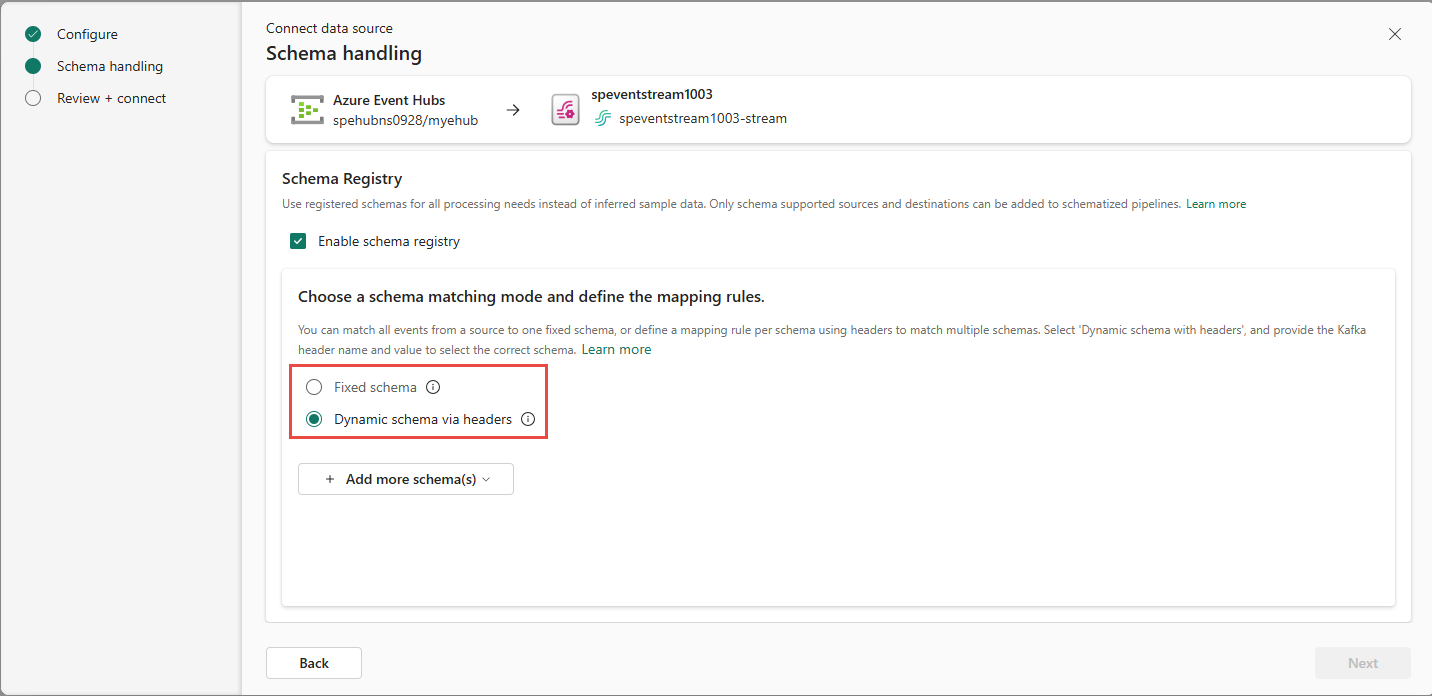
On the Schema handling page, provide rules to handle events received from the selected event hub, so that the eventstream can apply them correctly. The mapping rules depend on how you model the events.
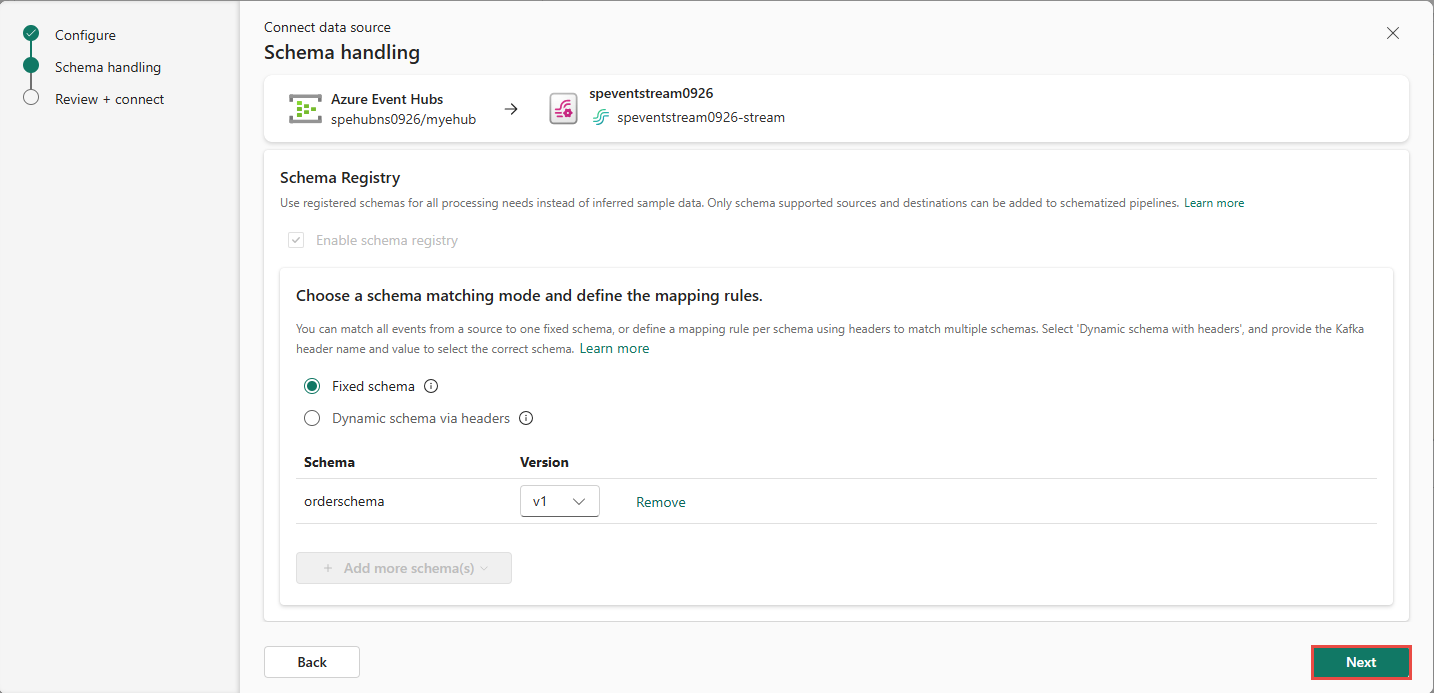
If you have one schema that governs all of the events, select Fixed schema.
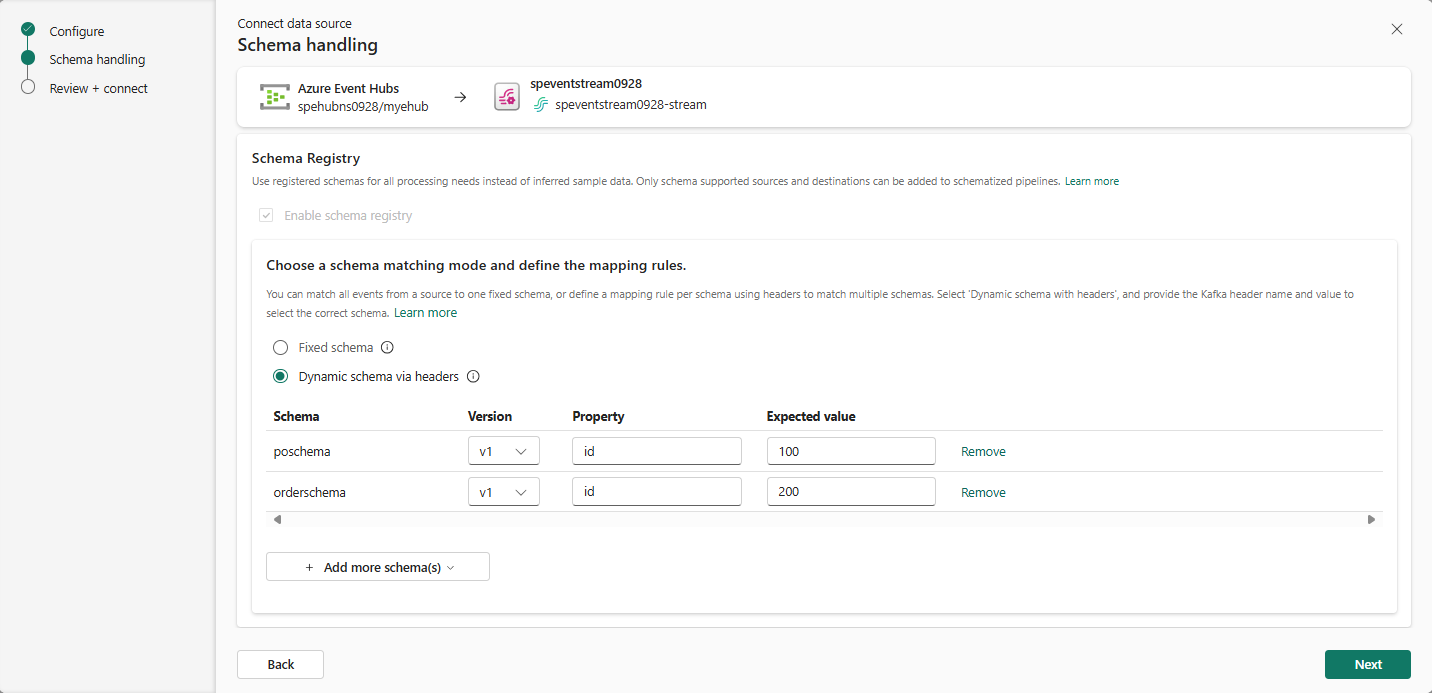
If you have multiple schemas that represent the various incoming events, define matching rules to apply your schemas. To choose this mode, select Dynamic schema via headers. Then, specify the rules by using header/value pairs to select each schema. The header is a custom Kafka header property that's part of the event metadata. The value is the expected value for that property.
Choose schemas by selecting the Add more schema(s) dropdown menu and then choosing one or more existing schemas from the event schema registry. If you don't have schemas to choose from, you can create new schemas from this view. To learn how to define a new event schema, see Create and manage event schemas in schema sets.
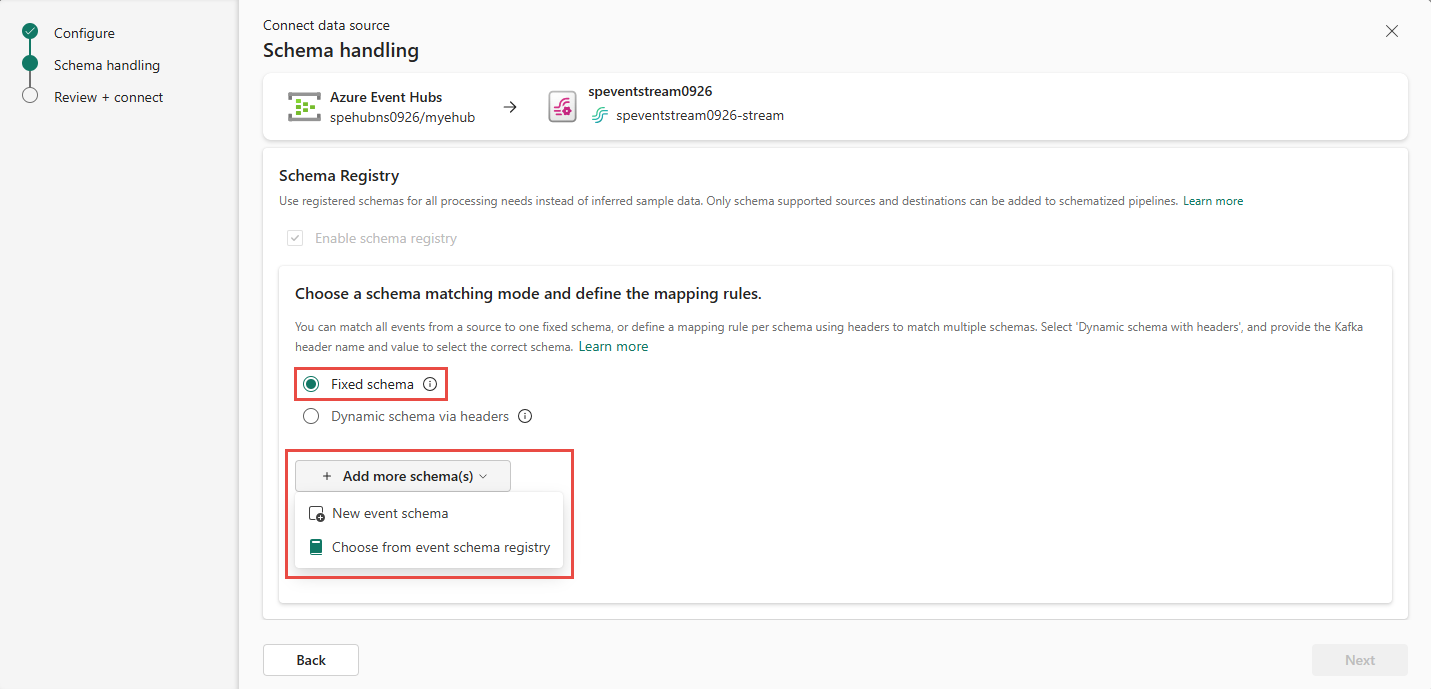
If you selected the Choose from event schema registry option, the Associate an event schema pane appears. Select one or more schemas from the registry, depending on your schema matching mode, and then select Choose at the bottom of the pane.

If you selected the Fixed schema option, you don't need to provide any more rules to match the schema. You can continue to the next step.
If you selected the Dynamic schema via headers option, specify the Kafka header property and the expected value that maps to the schema. Add more schemas and specify different header properties and/or different values to map to those schemas.
Note
When you define the mapping rules, each value of the header must be unique. If you try to reuse a schema, you see a warning message indicating that you might break existing streams. As long as the mapping rules are the same, you can reuse a schema. If this limitation affects your use, reach out to your Microsoft representative to share your feedback. We're actively working on removing this limitation.
After you map schemas for all expected events, select Next at the bottom of the Schema handling page.
Select Review and connect at the bottom of the Configure page.
Review the details on the Review + connect page, and then select Connect.


View data stream details
On the Review + connect page, if you select Open eventstream, the wizard opens the eventstream that it created for you with the selected event hub as a source. To close the wizard, select Finish at the bottom of the page.

You see the stream in the Recent streaming data section of the Real-Time hub home page. For detailed steps, see View details of data streams in Fabric Real-Time hub.


Use All sources tab to connect to an event hub
You can also use the All sources tab on the Add data page to connect to an Azure event hub. However, using the Azure tab is recommended as it's easier to connect to an event hub.
On the Add data page, select the Microsoft category at the top, and then select Azure Event Hubs.

Now, follow the instructions in the Connect to an Azure event hub section.
Configure and connect to the Azure event hub
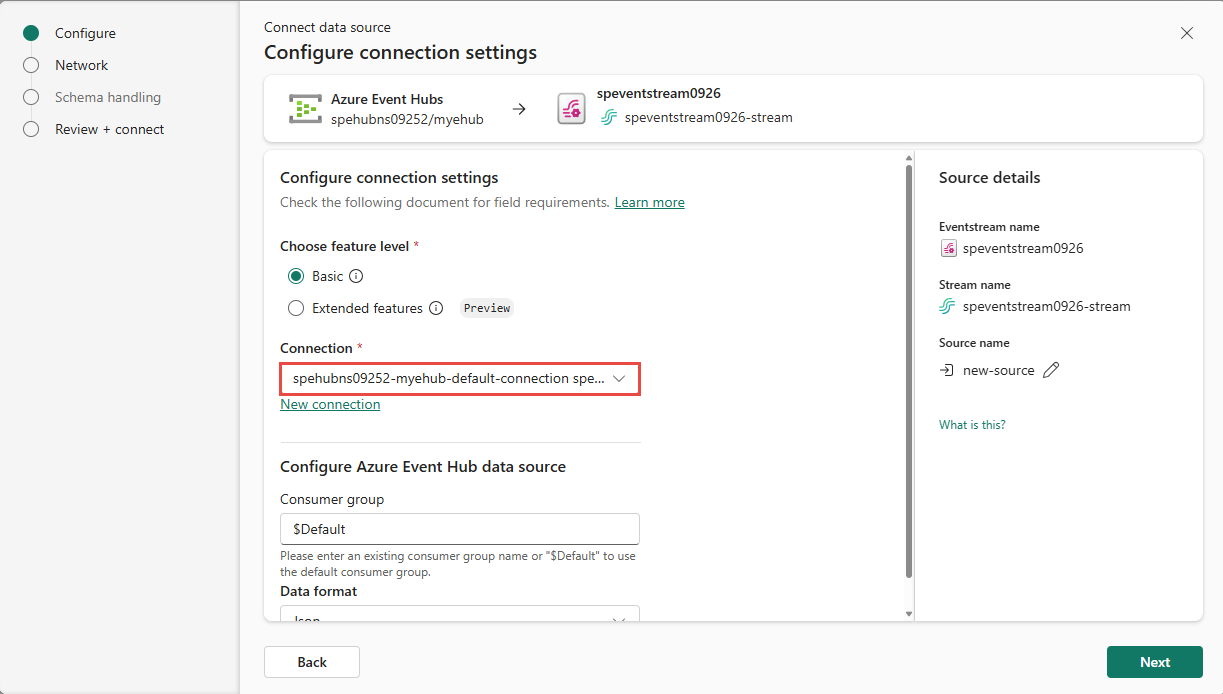
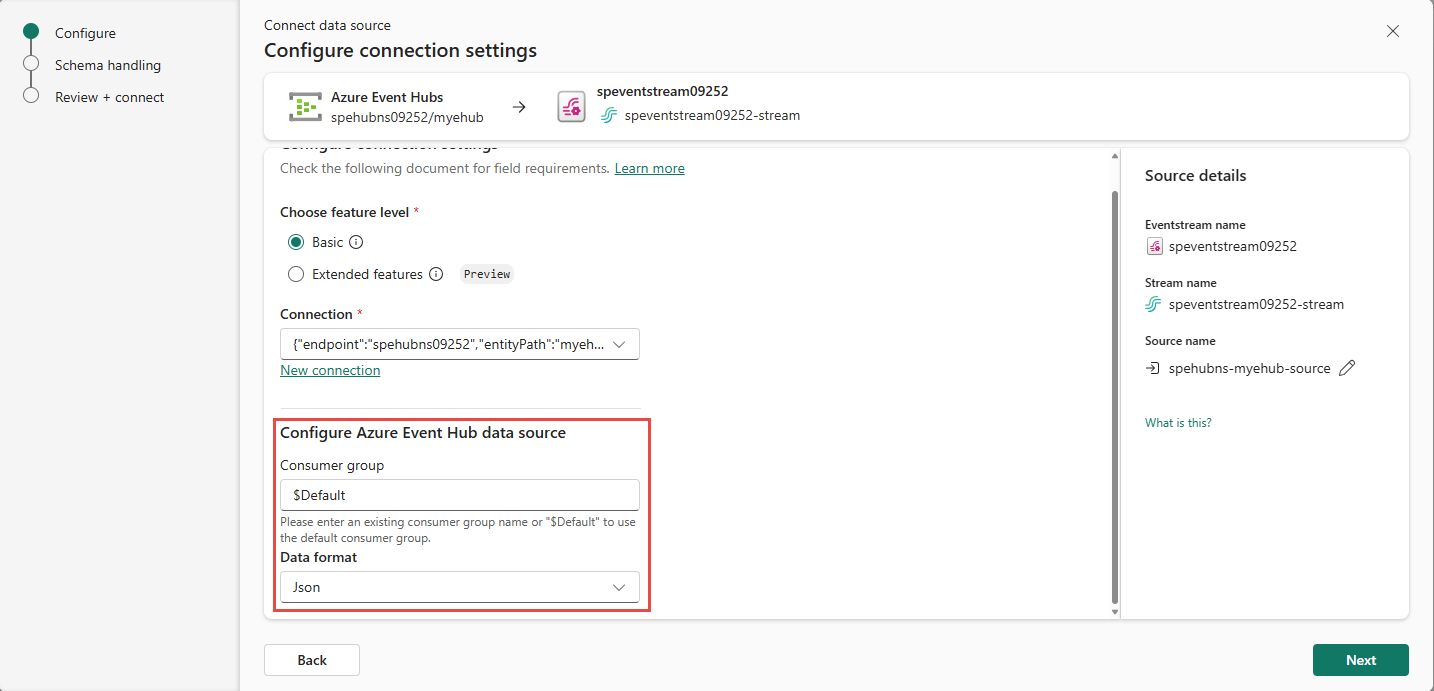
On Configure connection settings, confirm that Basic is selected for the feature level, and then select New connection.

If there's an existing connection to your event hub, select that existing connection. Then, move on to configuring the data format in the following steps.
In the Connection settings section, follow these steps:
- Enter the name of the Event Hubs namespace.
- Enter the name of the event hub.
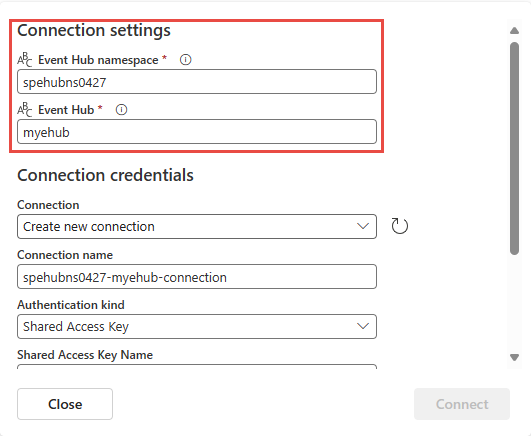
In the Connection credentials section, follow these steps:
- For Connection name, enter a name for the connection to the event hub.
- For Authentication kind, confirm that Shared Access Key is selected.
- For Shared Access Key Name, enter the name of the shared access key. For instructions on getting an access key, see Get an Azure Event Hubs connection string.
- For Shared Access Key, enter the value of the shared access key.
- Select Connect.

For Consumer group, enter the name of the consumer group. The default consumer group for the event hub is $Default.
For Data format, select a data format for the incoming real-time events that you want to get from your Azure event hub. You can select from JSON, Avro, and CSV (with header) data formats.
On the Source details pane to the right, select the pencil icon next to the source name, and then enter a name for the source. This step is optional.

Select Next at the bottom of the page.

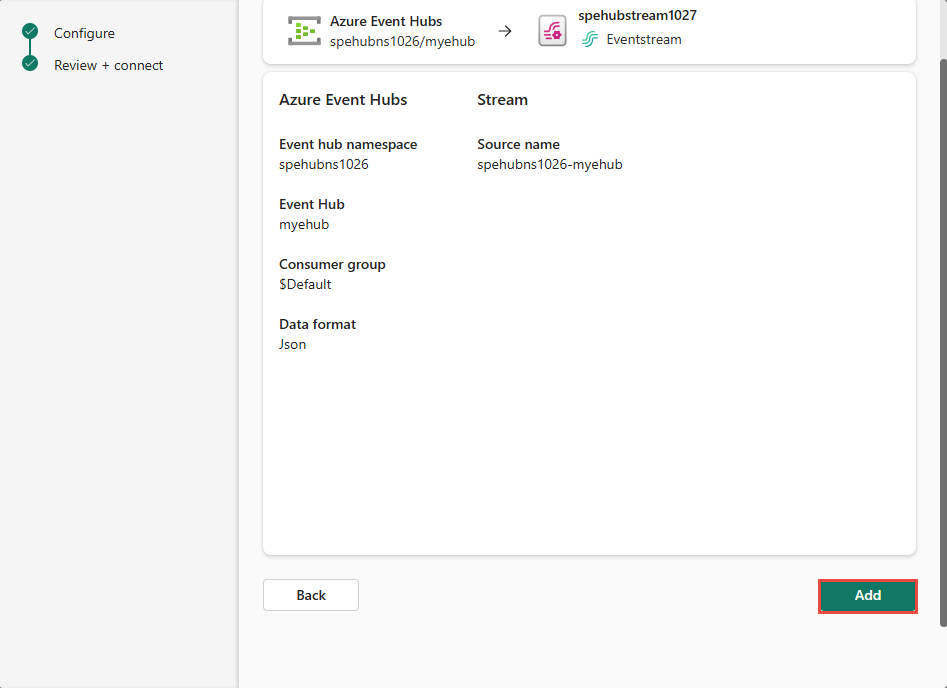
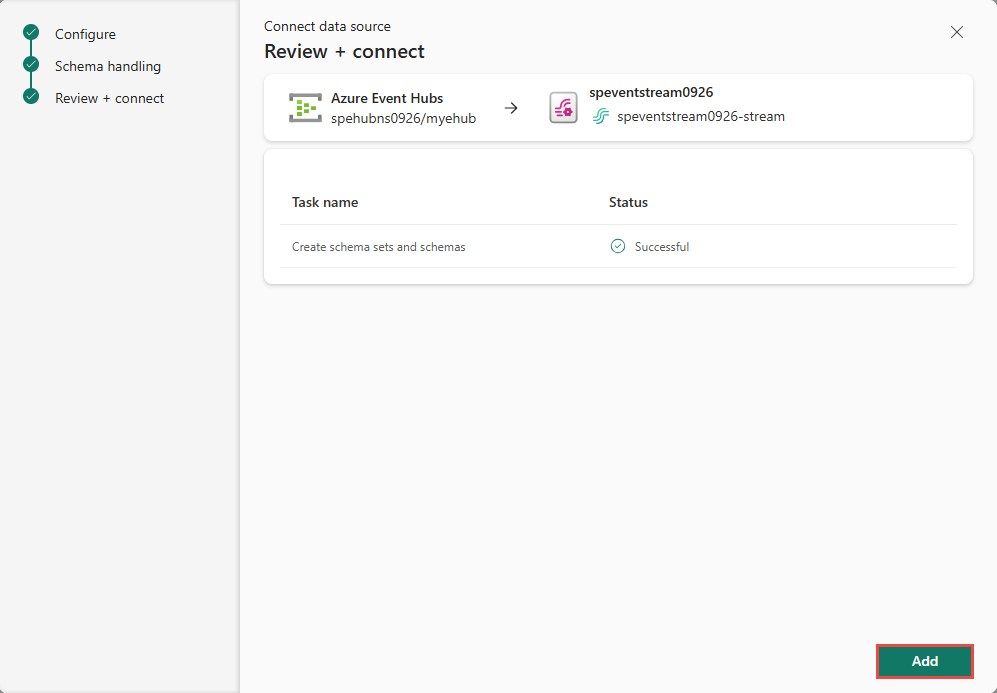
On the Review + connect page, review the settings, and then select Add.


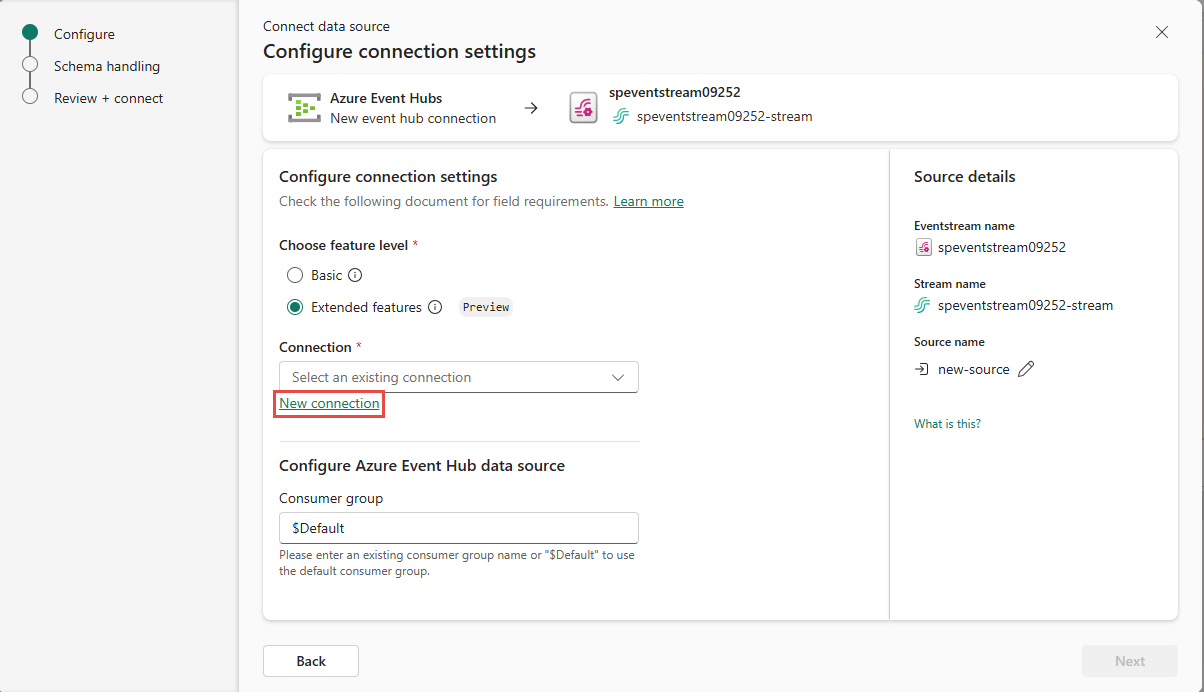
On Configure connection settings, for Choose feature level, select Extended features.
If there's an existing connection to your event hub, select that existing connection. Then, move on to configuring the data format in the following steps.
In the Connection settings section, follow these steps:
Enter the name of the Event Hubs namespace.
Enter the name of the event hub.
In the Connection credentials section, follow these steps:
For Connection name, enter a name for the connection to the event hub.
For Authentication kind, confirm that Shared Access Key is selected.
For Shared Access Key Name, enter the name of the shared access key. For instructions on getting an access key, see Get an Azure Event Hubs connection string.
For Shared Access Key, enter the value of the shared access key.
Select Connect.
For Consumer group, enter the name of the consumer group. The default consumer group for the event hub is $Default.


Stream or source details
On the Connect page, follow one of these steps based on whether you're using Eventstream or Real-Time hub.
Eventstream:
In the Source details pane to the right, follow these steps:
For Source name, select the Pencil button to change the name.
Notice that Eventstream name and Stream name are read-only.
Real-Time hub:
In the Stream details section to the right, follow these steps:
Select the Fabric workspace where you want to create the eventstream.
For Eventstream name, select the Pencil button, and enter a name for the eventstream.
The Stream name value is automatically generated for you by appending -stream to the name of the eventstream. This stream appears on the real-time hub's All data streams page when the wizard finishes.
Select Next at the bottom of the Configure page.
Schema handling page
On the Schema handling page, provide rules to handle events received from the selected event hub, so that the eventstream can apply them correctly. The mapping rules depend on how you model the events.
If you have one schema that governs all of the events, select Fixed schema.
If you have multiple schemas that represent the various incoming events, define matching rules to apply your schemas. To choose this mode, select Dynamic schema via headers. Then, specify the rules by using header/value pairs to select each schema. The header is a custom Kafka header property that's part of the event metadata. The value is the expected value for that property.
Choose schemas by selecting the Add more schema(s) dropdown menu and then choosing one or more existing schemas from the event schema registry. If you don't have schemas to choose from, you can create new schemas from this view. To learn how to define a new event schema, see Create and manage event schemas in schema sets.
If you selected the Choose from event schema registry option, the Associate an event schema pane appears. Select one or more schemas from the registry, depending on your schema matching mode, and then select Choose at the bottom of the pane.
If you selected the Fixed schema option, you don't need to provide any more rules to match the schema. You can continue to the next step.
If you selected the Dynamic schema via headers option, specify the Kafka header property and the expected value that maps to the schema. Add more schemas and specify different header properties and/or different values to map to those schemas.
Note
When you define the mapping rules, each value of the header must be unique. If you try to reuse a schema, you see a warning message indicating that you might break existing streams. As long as the mapping rules are the same, you can reuse a schema. If this limitation affects your use, reach out to your Microsoft representative to share your feedback. We're actively working on removing this limitation.
After you map schemas for all expected events, select Next at the bottom of the Schema handling page.
Review and connect
On the Review + connect page, review the settings, and then select Connect.

On the Review + connect page, select Add (Eventstream) or Connect (Real-Time hub).

Related content
To learn about consuming data streams, see the following articles: