Note
Access to this page requires authorization. You can try signing in or changing directories.
Access to this page requires authorization. You can try changing directories.
This article explains how to deploy disconnected operations for Azure Local in your datacenter. This step is key to deploy and operate Azure Local without any outbound network connection. After you deploy the management cluster (control plane), you deploy your first Azure Local instance.
Key considerations
When deploying disconnected operations and creating your management instance, consider the following key points:
- The network configuration and names you enter in the portal should be consistent with your setup and the previously created switches.
- Virtual deployments aren't supported. You must have physical machines.
- If you require VLAN on the control plane appliance you need to make sure to set that up using Set-VMNetworkAdapterIsolation -ManagementOS .
- You need at least three machines to support disconnected operations. You can use up to 16 machines for the management instance.
- The deployment of the Azure Local cluster can take several hours.
- The local control plane can experience periods of downtime during node reboots and updates.
- During the creation of the cluster, the process creates a thinly provisioned 2-TB infrastructure volume for disconnected operations. Don't tamper with or delete the infrastructure volumes created during the deployment process.
- When you create the Azure Local instance, the process moves the disconnected operations VM appliance to cluster storage and converts it to a clustered VM.
Prerequisites
| Requirements | Details |
|---|---|
| Hardware | Plan and understand the hardware |
| Identity | Plan and understand the identity |
| Networking | Plan and understand the networking |
| Public key infrastructure | Plan and understand the public key infrastructure (PKI) |
| Prepare Azure Local nodes | Prepare Azure Local for disconnected operations |
| Acquire disconnected operations | Acquire disconnected operations for Azure Local |
For more information, see Azure Local disconnected operations overview.
For information on known issues with disconnected operations for Azure Local, see Known issues for disconnected operations.
Checklist for deploying disconnected operations
Before you deploy Azure Local with disconnected operations, you need the following:
- Network plan:
- IP pool, ingress IP, fully qualified domain name (FQDN), domain name system (DNS), and gateway (GW).
- DNS server to resolve IP to FQDN names.
- Local credentials for Azure Local machines.
- Active directory credentials for Azure Local deployment.
- Active directory OU and networking requirements.
- Local credentials and AD credentials to meet minimum password complexity.
- Active directory prepared for Azure Local deployment.
- Certificates to secure ingress endpoints (23 certificates) and the public key (root) used to create these certificates.
- Certificates to secure the management endpoint (two certificates).
- Credentials and parameters to integrate with identity provider:
- Active Directory Federations Services (ADFS) application, credentials, server details, and certificate chain details for certificates used in identity configuration.
- Disconnected operations deployment files (manifest and appliance).
- The Azure Local composite ISO.
- Firmware/device drivers from OEM.
Deployment sequence
Deploy Azure Local with disconnected operations on non-premier hardware stock keeping units (SKUs). For more information, see Azure Local Catalog.
You deploy and configure Azure Local with disconnected operations in multiple steps. The following image shows the overall journey, including post-deployment.

Here's a brief overview of the tools and processes you use during the deployment. You'll need access to Azure Local nodes (OS or host) for the first phases of the deployment.
- Use the existing tools and processes to install and configure the OS. You need local admin access on all Azure Local nodes.
- Run PowerShell and the Operations module on the first machine (sorted by node name like
seed node). You must have local admin access. - Use the local Azure portal, Azure PowerShell, or Azure CLI. You don't need physical node access, but you do need Azure Role-Based Access Control (RBAC) with the Owner role.
- Use the local Azure portal, Azure PowerShell, or Azure CLI. You don't need physical node access, but you do need Azure RBAC with the Operator role.
Deploy disconnected operations (control plane)
Disconnected operations must be deployed on the first machine (seed node). Make sure you complete the following steps on every node in your management cluster. For more information, see Prepare Azure Local machines.
To prepare the first machine for the disconnected operations appliance, follow these steps:
Modify your path to correct location. If you initialized a data disk or are using a different path than C: modify the
$applianceConfigBasePath.Here's an example:
$applianceConfigBasePath = 'C:\AzureLocalDisconnectedOperations'Copy the disconnected operations installation files (appliance zip, vhdx, and manifest) to the first machine. Save these files into the base folder you created earlier.
Copy-Item \\fileserver\share\azurelocalfiles\* $applianceConfigBasePathVerify that you have these files in your base folder using the following command:
- AzureLocal.DisconnectedOperations.zip
- AzureLocal.DisconnectedOperations.manifest
- ArcA_LocalData_A.vhdx
- ArcA_SharedData_A.vhdx
- OSAndDocker_A.vhdx
- ArcA_SharedData_ACSTable_A.vhdx
- ArcA_SharedData_ACSBlob_A.vhdx
- ThirdPartyNotices.txt
Get-ChildItem $applianceConfigBasePathExtract the zip file in the same folder:
Expand-Archive "$($applianceConfigBasePath)\AzureLocal.DisconnectedOperations.zip" -DestinationPath $applianceConfigBasePathVerify that you have these files using the following command:
- OperationsModule (PowerShell module for installation)
- AzureLocal.DisconnectedOperations.manifest
- AzureLocal.DisconnectedOperations.zip
- manifest.xml
- IRVM.zip
- ArcA_LocalData_A.vhdx
- ArcA_SharedData_A.vhdx
- ArcA_SharedData_ACSBlob_A.vhdx
- ArcA_SharedData_ACSTable_A.vhdx
- OSAndDocker_A.vhdx
- Storage.json
Get-ChildItem $applianceConfigBasePathNote
At this point, remove the
AzureLocal.DisconnectedOperations.zipfile to save some space.Copy the certificates root directory. Save these files into the base folder you created earlier.
$certsPath = "$($applianceConfigBasePath)\certs"
Copy-Item \\fileserver\share\azurelocalcerts $certspath -recurse
Verify the certificates, public key, and management endpoint. You should have two folders:
ManagementEndpointsCertsandIngressEndpointsCertsand at least 24 certificates.Get-ChildItem $certsPath Get-ChildItem $certsPath -recurse -filter *.pfxImport the Operations module. Run the command as an administrator using PowerShell. Modify the path to match your folder structure.
Import-Module "$applianceConfigBasePath\OperationsModule\Azure.Local.DisconnectedOperations.psd1" -Force

$mgmntCertFolderPath = "$certspath\ManagementEndpointsCerts"
$ingressCertFolderPath = "$certspath\IngressEndpointsCerts"
Initialize the parameters
Populate the required parameters based on your deployment planning. Modify the examples to match your configuration.
Populate the management network configuration object.
$CertPassword = "retracted"|ConvertTo-Securestring -AsPlainText -Force
$ManagementIngressIpAddress = "192.168.50.100"
$ManagementNICPrefixLength = 24
$mgmtNetworkConfigParams = @{
    ManagementIpAddress = $ManagementIngressIpAddress
    ManagementIpv4PrefixLength = $ManagementNICPrefixLength
    TlsCertificatePath = "$mgmntCertFolderPath\ManagementEndpointSsl.pfx"
    TlsCertificatePassword = $CertPassword
    ClientCertificatePath = "$mgmntCertFolderPath\ManagementEndpointClientAuth.pfx"
    ClientCertificatePassword = $CertPassword
}
$managementNetworkConfiguration = New-ApplianceManagementNetworkConfiguration @mgmtNetworkConfigParams
Note
The password for the certificates must be in the secure string format. For certificates pertaining to the management endpoint, see PKI for disconnected operations.
Populate the ingress network configuration object.
$azureLocalDns = "192.168.200.150"
$NodeGw = "192.168.200.1"
$IngressIpAddress = "192.168.200.115"
$NICPrefixLength= 24
$ingressNetworkConfigurationParams = @{
    DnsServer = $azureLocalDns
    IngressNetworkGateway = $NodeGw
    IngressIpAddress = $IngressIpAddress
    IngressNetworkPrefixLength = $NICPrefixLength
    ExternalDomainSuffix = "autonomous.cloud.private"
}
$ingressNetworkConfiguration = New-ApplianceIngressNetworkConfiguration @ingressNetworkConfigurationParams
For network configuration details, see Networking for disconnected operations.
Populate the identity configuration object.
$oidcCertChain = Get-CertificateChainFromEndpoint -requestUri 'https://adfs.azurestack.local/adfs'
# Omitted this step if you don't have LDAPS.

$ldapsCertChain = Get-CertificateChainFromEndpoint -requestUri 'https://dc01.azurestack.local'

# LDAPS default port (Non secure default = 3268)
$ldapPort = 3269
$ldapPassword = 'RETRACTED'|ConvertTo-SecureString -AsPlainText -Force

# Populate params with LDAPS enabled.
$identityParams = @{
    Authority = "https://adfs.azurestack.local/adfs"
    ClientId = "<ClientId>"
    RootOperatorUserPrincipalName = "operator@azurestack.local"
    LdapServer = "adfs.azurestack.local"
    LdapPort = $ldapPort
    LdapCredential = New-Object PSCredential -ArgumentList @("ldap", $ldapPassword)
    SyncGroupIdentifier = "<SynGroupIdentifier>"
    OidcCertChainInfo = $oidcCertChain
    LdapsCertChainInfo = $ldapsCertChain
}
$identityConfiguration = New-ApplianceExternalIdentityConfiguration @identityParams
Note
LdapsCertChainInfoandOidcCertChaincan be omitted completely for debugging or demo purposes. For information on how to get LdapsCertChainInfo and OidcCertChainInfo, see PKI for disconnected operations.
There's an issue with the
Get-CertificateChainFromEndpointnot being exported as intended. Use the steps in Known issues for disconnected operations for Azure Local to mitigate this issue.For more information, see Identity for disconnected operations.
Populate the external certificates configuration object.
$ingressCertPassword = "retracted"|ConvertTo-Securestring -AsPlainText -Force
$certsParams = @{
    certificatesFolder = $ingressCertFolderPath
    certificatePassword = $ingressCertPassword
}
$CertificatesConfiguration = New-ApplianceCertificatesConfiguration @certsParams
For more information, see PKI for disconnected operations.
Install and configure the appliance
To install and configure the appliance on the first machine, use the following command. Point the AzureLocalInstallationFile to a path that contains the IRVM01.zip.
$networkIntentName = 'ManagementComputeStorage'
$azureLocalInstallationFile = "$($applianceConfigBasePath)"
$applianceManifestJsonPath = Join-Path $applianceConfigBasePath AzureLocal.DisconnectedOperations.manifest.json

$installAzureLocalParams = @{
    Path = $azureLocalInstallationFile
    IngressNetworkConfiguration = $ingressNetworkConfiguration
    ManagementNetworkConfiguration = $managementNetworkConfiguration
    IngressSwitchName = "ConvergedSwitch($networkIntentName)"
    ManagementSwitchName = "ConvergedSwitch($networkIntentName)"
    ApplianceManifestFile = $applianceManifestJsonPath
    IdentityConfiguration = $identityConfiguration
    CertificatesConfiguration = $CertificatesConfiguration
}

Install-Appliance @installAzureLocalParams -disconnectMachineDeploy -Verbose

# Note: If you're deploying the appliance with limited connectivity, you can omit the flag -disconnectMachineDeploy.
Note
Install the appliance on the first machine to ensure Azure Local deploys correctly. The setup takes a few hours and must finish successfully before you move on. Once it’s complete, you have a local control plane running in your datacenter.
If the installation fails because of incorrect network, identity, or observability settings, update the configuration object and run the Install-appliance command again.
You can also specify the -clean switch to start installation from scratch. This switch resets any existing installation state and starts from the beginning
Configure observability for diagnostics and support
We recommend that you configure observability to get system-generated logs for your first deployment. This doesn't apply if you're planning to run air-gapped, as system-generated logs and diagnostics require connectivity.
The Azure resources needed:
- A resource group in Azure used for the appliance.
- A Service Principal Name (SPN) with contributor rights on the resource group.
To configure observability, follow these steps:
On a computer with Azure CLI (or using the Azure Cloud Shell in Azure portal) create the SPN. Run the following script:
$resourcegroup = 'azure-disconnectedoperations'
$appname = 'azlocalobsapp'
az login
$g = (az group create -n $resourcegroup -l eastus)|ConvertFrom-Json
az ad sp create-for-rbac -n $appname --role Owner --scopes $g.id

# Get the Subscription ID
$j = (az account list | ConvertFrom-Json) | Where-object {$_.IsDefault}

# SubscriptionID:
$j.id
Here's an example output:
{
  "appId": "<AppId>",
  "displayName": "azlocalobsapp",
  "password": "<RETRACTED>",
  "tenant": "<RETRACTED>"
}
<subscriptionID>
Set the observability configuration. Modify to match your environment details:
$observabilityConfiguration = New-ApplianceObservabilityConfiguration -ResourceGroupName "azure-disconnectedoperations" `
  -TenantId "<TenantID>" `
  -Location "<Location>" `
  -SubscriptionId "<SubscriptionId>" `
  -ServicePrincipalId "<AppId>" `
  -ServicePrincipalSecret ("<Password>" | ConvertTo-SecureString -AsPlainText -Force)

Set-ApplianceObservabilityConfiguration -ObservabilityConfiguration $observabilityConfiguration
Verify that observability is configured:
Get-ApplianceObservabilityConfiguration
Add the Azure Local disconnected operations environment to the nodes
In order for the nodes to understand your private cloud environment, you must add the local environment. This is required for bootstrapping the Azure Local nodes later to the control plane.
On each node, run the following from PowerShell:
Add-AzLocalEnvironment -CloudFQDN "autonomous.cloud.private"
Note
This defaults to the built-in directoryTenantId and endpoints. For more information, use Get-Help Add-AzLocalEnvironment
For environments prior to 2603, use the legacy Add-AzEnvironment approach below.
# Legacy approach from prior to 2603 adding a private cloud environment
$applianceCloudName = "azure.local"
$applianceFQDN = "autonomous.cloud.private"

$AdminManagementEndPointUri = "https://armmanagement.$($applianceFQDN)/"
$DirectoryTenantId = "98b8267d-e97f-426e-8b3f-7956511fd63f"

#Retrieve disconnected operations endpoints

$armMetadataEndpoint = $AdminManagementEndPointUri.ToString().TrimEnd('/') + "/metadata/endpoints?api-version=2015-01-01"

$endpoints = Invoke-RestMethod -Method Get -Uri $armMetadataEndpoint -ErrorAction Stop

$azEnvironment = Add-AzEnvironment `
-Name $applianceCloudName `
-ActiveDirectoryEndpoint ($endpoints.authentication.loginEndpoint.TrimEnd('/') + "/") `
-ActiveDirectoryServiceEndpointResourceId $endpoints.authentication.audiences[0] `
-ResourceManagerEndpoint $AdminManagementEndPointUri.ToString() `
-GalleryEndpoint $endpoints.galleryEndpoint `
-MicrosoftGraphEndpointResourceId $endpoints.graphEndpoint `
-MicrosoftGraphUrl $endpoints.graphEndpoint `
-AdTenant $DirectoryTenantId `
-GraphEndpoint $endpoints.graphEndpoint `
-GraphAudience $endpoints.graphEndpoint `
-EnableAdfsAuthentication:($endpoints.authentication.loginEndpoint.TrimEnd("/").EndsWith("/adfs",[System.StringComparison]::OrdinalIgnoreCase))


# Verify that you can connect to the ARM endpoint (example showing device authentication)
Connect-AzAccount -EnvironmentName $applianceCloudName -UseDeviceAuthentication
Subscription placement for the dedicated management cluster
We require deploying a fully dedicated management cluster. The recommended practice is to place your management cluster in the operator subscription. This will help you restrict and isolate the control plane from workloads and you can restrict workloads from being created on the same cluster as other tenants.
Keeping the control plane separated from the workloads provides a clear separation of concerns.
Ensure you limit access to the operator subscription to only required personnel.
Register required resource providers
Make sure you register the required resource providers before deployment.
Here's an example of how to automate the resource providers registration from Azure PowerShell.
Note
Run this script on a client machine, not on the Azure Local nodes. If you run it on an Azure Local node, verify the Az.Resources version to avoid deployment conflicts.
$applianceCloudName = "azure.local"
$subscriptionName = "Operator subscription"

<# Use this block only when running this script from an Azure Local node. Check whether Az.Resources 8.1.1 is installed and install it if needed (2603).
$requiredModule = "Az.Resources"
$requiredVersion = "8.1.1"
$installedModule = Get-InstalledModule -Name $requiredModule -ErrorAction SilentlyContinue

# If operating air-gaped, you need to download and copy this module manually
if (-not $installedModule -or $installedModule.Version -lt $requiredVersion) {
     Write-Host "Installing $requiredModule version $requiredVersion..."
     Install-Module -Name $requiredModule -RequiredVersion $requiredVersion -Force
     Write-Information "Make sure Az.Resources is the correct version if you are running this script on an Azure Local node rather than a client"
}#>

# Register resource providers
# Connect to the ARM endpointusing device authentication
Connect-AzAccount -EnvironmentName $applianceCloudName -UseDeviceAuthentication
Write-Host "Selecting a different subscription than the operator subscription.."
$subscription = Get-AzSubscription -SubscriptionName $subscriptionName

# Set the context to that subscription
Set-AzContext -SubscriptionId $subscription.Id

Register-AzResourceProvider -ProviderNamespace  "Microsoft.EdgeArtifact"
Register-AzResourceProvider -ProviderNamespace "Microsoft.HybridCompute"
Register-AzResourceProvider -ProviderNamespace "Microsoft.GuestConfiguration"
Register-AzResourceProvider -ProviderNamespace "Microsoft.HybridConnectivity"
Register-AzResourceProvider -ProviderNamespace "Microsoft.AzureStackHCI"
Register-AzResourceProvider -ProviderNamespace "Microsoft.Kubernetes"
Register-AzResourceProvider -ProviderNamespace "Microsoft.KubernetesConfiguration"
Register-AzResourceProvider -ProviderNamespace "Microsoft.ExtendedLocation"
Register-AzResourceProvider -ProviderNamespace "Microsoft.ResourceConnector"
Register-AzResourceProvider -ProviderNamespace "Microsoft.HybridContainerService"

# Not required on disconnected operations
# Register-AzResourceProvider -ProviderNamespace "Microsoft.Attestation"
# Register-AzResourceProvider -ProviderNamespace "Microsoft.Storage"
# Register-AzResourceProvider -ProviderNamespace "Microsoft.Insights"

# Required for automating Key Vault creation, not for Azure Local.
Register-AzResourceProvider -ProviderNamespace "Microsoft.KeyVault"
Wait until all resource providers are in the state Registered.
To list all resource providers and their statuses, run the following command.
Get-AzResourceProvider | Format-Table
Note
To register or view resource provider statuses in the local portal, go to your Subscription, expand Settings, and select Resource providers.
Deploy Azure Local to form the management cluster
You now have a control plane deployed and configured, a subscription and resource group created for your Azure Local deployment, and (optionally) an SPN created to use for deployment automation.
Verify the deployment before creating local Azure resources.
- Sign in with the root operator you defined during the deployment, or use a subscription owner account.
- From a client with network access to your Ingress IP, open your browser and go to
https://portal.<FQDN>. Replace<FQDN>with your domain name.- You're redirected to your identity provider to sign in.
- Sign in to your identity provider with the credentials you configured during deployment.
- You should see Azure portal running in your network.
- Check that a subscription exists for your Azure Local infrastructure (for example, Operator subscription).
- Check that required resource providers are registered in the subscription.
- Check that a resource group exists for your Azure Local infrastructure (for example, azurelocal-disconnected-operations).
Note
The management cluster doesn't support AD-less deployments.
Initialize each Azure Local node
To initialize each node, run this PowerShell script. Modify the variables necessary to match your environment details:
Note
If your machines come preinstalled with an OEM image, follow the steps in Handle preinstalled OEM images in disconnected operations.
$resourcegroup = 'azurelocal-management-cluster'
$applianceCloudName = "azure.local"
$applianceConfigBasePath = "C:\AzureLocalDisconnectedOperations\"
$applianceFQDN = "autonomous.cloud.private"
 $subscriptionName = "Operator subscription"

Connect-AzAccount -EnvironmentName $applianceCloudName -UseDeviceAuthentication
Write-Host "Ensuring you are using operator subscription for the management cluster.."
$subscription = Get-AzSubscription -SubscriptionName $subscriptionName

# Set the context to that subscription
Set-AzContext -SubscriptionId $subscription.Id

$armTokenResponse = Get-AzAccessToken -ResourceUrl "https://armmanagement.$($applianceFQDN)"

# $ArmAccessToken = $armTokenResponse.Token
# Convert token to string for use in initialization
# Workaround needed for Az.Accounts 5.0.4
$ArmAccessToken = [System.Net.NetworkCredential]::new("", $armTokenResponse.Token).Password

# Bootstrap each node
Invoke-AzStackHciArcInitialization -SubscriptionID $subscription.Id -TenantID $subscription.TenantId -ResourceGroup $resourceGroup -Cloud $applianceCloudName -Region "Autonomous" -CloudFqdn $applianceFQDN -ArmAccessToken $ArmAccessToken -TargetSolutionVersion '12.2604.1003.1005'
# If bootstrap fails or timesouts after 45:00:00 - see known-issues with CRL.
Note
Ensure that you run initialization on the first machine before moving on to other nodes.
Nodes appear in the local portal shortly after you run the steps, and the extensions appear on the nodes a few minutes after installation.
You can also use the Configurator App to initialize each node.
Ensure that the TargetSolutionVersion parameter is set to the correct solution version used for the deployment, such as 12.2604.1003.1005.
Handle preinstalled OEM images in disconnected operations
Prerequisites
Download CombinedSolutionBundle. For more information, see Solution update bundle.
On a connected machine, download the bootstrap package.
Update the bootstrap service
Copy and extract the BootstrapBundle.zip file. This bundle includes:
Update-BootstrapService.ps1. Signed update script.
Microsoft.Azure.Edge.Bootstrap.Setup.Official.release.10.3342.1.3008.nupkg. Bootstrap NuGet package.
Copy both files to each Azure Local node. For example, copy them to C:\packages.
On each node, run the bootstrap update script and verify that the bootstrap service updated successfully.
# Run the bootstrap update script on the node
C:\packages\Update-BootstrapService.ps1 -NugetPath "C:\packages\Microsoft.Azure.Edge.Bootstrap.Setup.Official.release.10.3342.1.3008.nupkg"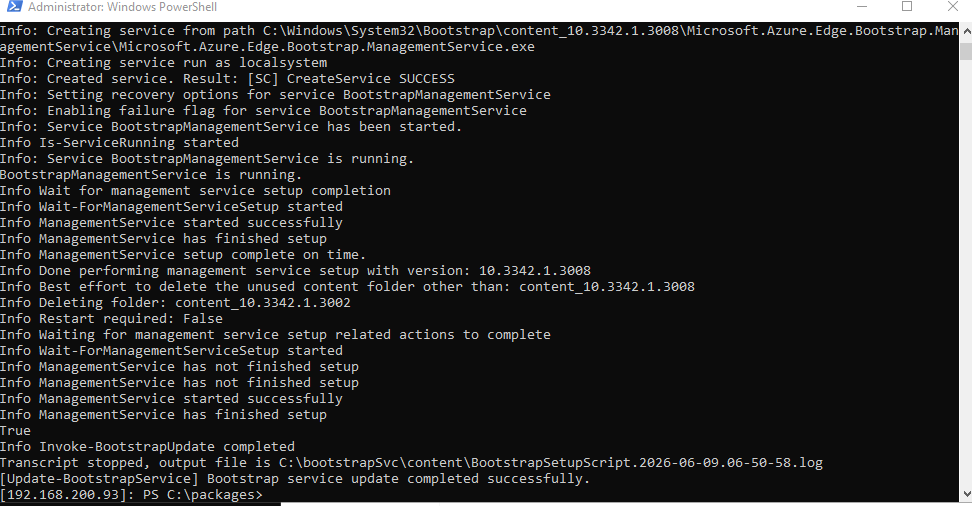
Verify that the bootstrap service update completes successfully.

Initialize Azure Arc
Copy Platform.zip to C:\zerodayupdate directory on each node.
On each node, run the
Invoke-AzStackHciArcInitializationcommand:# Initialize Azure Arc with ALDO-specific parameters Invoke-AzStackHciArcInitialization -TenantId $Tenant -SubscriptionID $Subscription -ResourceGroup $RG -Region $Region # cloud must be set to `Azure.local` for disconnected operations -Cloud "Azure.local" -TargetSolutionVersion "<SolutionVersionToDeploy>" #LocalPlatformPackagePath - The local path to the `Platform.zip` file you copied -LocalPlatformPackagePath "C:\zerodayupdate\Platform.zip"Important
Set the Cloud parameter to
Azure.local. Any other value causes the node to attempt registration with the public Azure cloud, which fails in a disconnected environment. Ensure the TargetSolutionVersion matches your disconnected operations appliance version. Mismatched versions cause deployment failures.
Wait for the initialization to complete. This process might take up to 30-60 minutes.
Run the following command on the seed node and wait until the appliance is healthy:
Get-ApplianceHealthStateRun
Invoke-AzStackHciArcInitializationagain on each node.

Pre-create Azure Key Vault
Create the Azure Key Vault before you deploy Azure Local to avoid long deployment delays caused by a known issue.
For a code example, see Known issues.
After you create the Key Vault, wait 5 minutes before you continue with the next portal deployment step.
Deploy the management cluster (first Azure Local instance)
With the control plane deployed and configured - you can complete the management cluster by deploying Azure Local using your local control plane.
Follow these steps to create an Azure Local instance (cluster):
- Access the local portal from a browser of your choice.
- Navigate to
portal.FQDN. For example,https://portal.autonomous.cloud.private. - Select your nodes and complete the deployment steps outlined in Deploy Azure Local using the Azure portal.
Note
If you create Azure Key Vault during deployment, wait about 5 minutes for RBAC permissions to take effect.
If you see a validation error, it’s a known issue. Permissions might still be propagating. Wait a bit, refresh your browser, and redeploy the cluster.
Tasks after deploying disconnected operations
Perform the following tasks after deploying Azure Local with disconnected operations:
- Back up the BitLocker keys (do not skip this step). During deployment, the appliance is encrypted. Without the recovery keys for the volumes, you can't recover and restore the appliance. For more information, see Understand security controls with disconnected operations on Azure Local.
- Assign extra operators. You can assign one or more operators by navigating to Operator subscriptions. Assign the contributor role at the subscription level.
- Export the host guardian service certificates and back up the folder you export them to on an external share or drive.
- Register the management cluster
- Lock down the management cluster. Restrict operators from deploying workloads on the management cluster. Limit operator access to a select few and enforce this restriction using Azure Policy to block workloads on the cluster resource.
- Clean up disks. If data disks were used during the bootstrap process, ensure they are removed.
Note
Do not skip these steps. Consider this as a deployment completion checklist. These steps are critical in order to be able to recover in case of disasters, receive support and to stay compliant.
Deploy workload clusters
To deploy standard Azure Local instances as workload clusters, follow the same steps used for the management cluster.
Deploy a rack aware cluster
Starting with the version 2604 release, you can deploy an Azure Local rack aware cluster in Azure Local disconnected operations.
A file share witness is required for deploying a rack aware cluster in Azure Local disconnected operations. The file share must be a local file share and hosted on a Windows server joined to the same Active Directory forest as the cluster.
Before starting the deployment, complete the following prerequisites:
Add the Azure Local disconnected operations environment to the nodes
Import the root certificate public key onto each node. Refer to steps 8 to 10 of Prepare Azure Local for disconnected deployments.
To deploy a rack aware cluster, use the following ARM template: create-cluster-rac-enabled-disconnected.
For an example that shows the format of various inputs, such as ArcNodeResourceID, see parameter JSON file azuredeploy.parameters.json. For a detailed description of parameters defined in these files, see ARM template parameters reference.
Important
- Ensure that all parameters in the JSON file are filled out.
- Replace any placeholder values such as [""] with actual data. These placeholders indicate that the parameter expects an array structure.
- If required values are missing or incorrectly formatted, the validation fails.
Example rack aware cluster configuration
The following example deploys a four-node rack aware cluster with two nodes in each rack:
node1 and node2 are physically located in the same rack (Zone1).
node3 and node4 are located in a different rack (Zone2).
In addition to all standard deployment parameters, configure the following parameters for rack aware deployment.
Arc node resource IDs
"arcNodeResourceIds": {
"value": [
"/subscriptions/<SubscriptionID>/resourceGroups/<ResourceGroupName>/providers/Microsoft.HybridCompute/machines/node1",
"/subscriptions/<SubscriptionID>/resourceGroups/<ResourceGroupName>/providers/Microsoft.HybridCompute/machines/node2",
"/subscriptions/<SubscriptionID>/resourceGroups/<ResourceGroupName>/providers/Microsoft.HybridCompute/machines/node3",
"/subscriptions/<SubscriptionID>/resourceGroups/<ResourceGroupName>/providers/Microsoft.HybridCompute/machines/node4"
]
}
Cluster pattern and local availability zones
Set clusterPattern to RackAware and define a local availability zone for each rack. Assign nodes to zones based on their physical rack location. In this example, node1 and node2 are in Zone1, while node3 and node4 are in Zone2.
"clusterPattern": {
"value": "RackAware"
},
"localAvailabilityZones": {
    "value": [
    {
        "localAvailabilityZoneName": "Zone1",
        "nodes": ["node1","node2"]
    },
    {
        "localAvailabilityZoneName": "Zone2",
        "nodes": ["node3","node4"]
    }
    ]
}
File share witness
A rack aware cluster in Azure Local disconnected operations requires a file share witness. Set witnessType to FileShare and specify the UNC path to the file share.
"witnessType": {
    "value": "FileShare"
},
"witnessPath": {
    "value": "witness_share_path"
}
Network intent configuration
For rack aware clusters, the storage network intent must be a dedicated intent separate from management and compute traffic. Define two network intents:
- ManagementCompute — handles management and compute traffic on shared adapters.
- Storage — handles storage traffic on dedicated adapters.
Configure the storage VLAN IDs for each storage adapter. The default VLAN IDs (711 and 712) can be customized for your environment.
"networkingType": {
    "value": "switchedMultiserverDeployment"
},
"networkingPattern": {
    "value" : "convergedManagementCompute"
},
"intentList" : {
    "value": [
        {
            "name": "ManagementCompute",
            "trafficType": [
                "Management",
                "Compute"
            ],
            "adapter": [
                "ethernet",
                "ethernet 2"
            ],
            "overridevirtualswitchConfiguration": false,
            "virtualswitchConfigurationoverrides": {
                "enableIov": "",
                "loadBalancingAlgorithm": ""
            },
            "overrideQosPolicy": false,
            "qosPolicyoverrides": {
                "priorityvalue8021Action_SMB": "",
                "priorityvalues8021Action_Cluster": "",
                "bandwidthPercentage_SMB": ""
            },
            "overrideAdapterProperty": false,
            "adapterPropertyoverrides": {
                "jumboPacket": "",
                "networkDirect": "",
                "networkDirectTechnology": ""
            }
        },
        {
            "name": "Storage",
            "trafficType": [
                    "Storage"
            ],
            "adapter": [
                "ethernet 3",
                "ethernet 4"
            ],
            "overridevirtualswitchConfiguration": false,
            "virtualswitchConfigurationoverrides": {
                "enableIov": "",
                "loadBalancingAlgorithm": ""
            },
            "overrideQosPolicy": false,
            "qosPolicyoverrides": {
                "priorityvalue8021Action_SMB": "",
                "priorityvalues8021Action_Cluster": "",
                "bandwidthPercentage_SMB": ""
            },
            "overrideAdapterProperty": false,
            "adapterPropertyoverrides": {
                "jumboPacket": "",
                "networkDirect": "",
                "networkDirectTechnology": ""
            }
      }
    ]
},
"storageNetworkList": {
    "value": [
        {
            "name": "Storage1Network",
            "networkAdapterName": "ethernet 3",
            "vlanId": "711"
        },
        {
            "name": "Storage2Network",
            "networkAdapterName": "ethernet 4",
            "vlanId": "712"
        }
    ]
}
Appendix
Lock down management cluster
$operatorSubscriptionId = 'a1b2c3d4-e5f6-7890-abcd-ef1234567890'
$resourceGroup = 'azurelocal-management-cluster'
$managementClusterLocationName = 'managementcluster-location'
$customLocationId = "/subscriptions/$($operatorSubscriptionId)/resourceGroups/$($resourceGroup)/providers/Microsoft.ExtendedLocation/customLocations/$($managementClusterLocationName)"
Import-Module "$applianceConfigBasePath\OperationsModule\AzureLocal.Orchestration.psm1"
Set-ManagementClusterLock `
        -Enabled $true `
        -SubscriptionId $operatorSubscriptionId `
        -MgmtClusterCustomLocationId $customLocationId
Clean up data disks used for bootstrap
# ===============================
# Remove CSV and Return Space to Pool
# ===============================

$CsvName="Cluster Virtual Disk (InfraLocal_1)"
$VirtualDiskName ="InfraLocal_1"

Write-Host "Starting CSV removal process..." -ForegroundColor Cyan

# --- Validate CSV exists ---
$csv = Get-ClusterSharedVolume -Name $CsvName -ErrorAction Stop
Write-Host "Found CSV: $($csv.Name)"

# --- Remove CSV ---
$csv = remove-ClusterSharedVolume -Name $CsvName -ErrorAction Stop
Write-Host "Removed CSV: $($csv.Name)"

# --- Take Cluster Resources offline ---
Write-Host "Taking CSV resource offline..." -ForegroundColor Yellow
Stop-ClusterResource -Name $csv.name -Wait 120

# --- Remove Cluster Resources offline ---
Write-Host "Taking CSV resource offline..." -ForegroundColor Yellow
remove-ClusterResource -Name $csv.name

# --- Remove virtual disk and return space to pool ---
Write-Host "Remoing virtual disk..." -ForegroundColor Yellow
remove-virtualdisk -FriendlyName $VirtualDiskName
Troubleshoot and reconfigure by using management endpoint
To use the management endpoint for troubleshooting and reconfiguration, you need the management IP address used during deployment, along with the client certificate and password used to secure the endpoint.
From a client with network access to the management endpoint, import the OperationsModule and set the context (modify the script to match your configuration):
Import-Module "$applianceConfigBasePath\OperationsModule\Azure.Local.DisconnectedOperations.psd1" -Force

$password = ConvertTo-SecureString 'RETRACTED' -AsPlainText -Force
$context = Set-DisconnectedOperationsClientContext -ManagementEndpointClientCertificatePath "${env:localappdata}\AzureLocalOpModuleDev\certs\ManagementEndpoint\ManagementEndpointClientAuth.pfx" -ManagementEndpointClientCertificatePassword $password -ManagementEndpointIpAddress "169.254.53.25"
After setting the context, you can use all the management cmdlets provided by the Operations module, like resetting identity configuration, checking health state, and more.
To get a full list of cmdlets provided, use the PowerShell Get-Command -Module OperationsModule. To get details around each cmdlet, use the Get-Help <cmdletname> command.
Troubleshooting deployments
System not configured
After you install the appliance, you might see this screen for a while. Let the configuration run for 2 to 3 hours. After you wait the 2 to 3 hours, the screen goes away, and you see the regular Azure portal. If the screen doesn't go away and you can't access the local Azure portal, troubleshoot the issue.

To find logs from the OperationsModule on the first machine, go to
C:\ProgramData\Microsoft\AzureLocalDisconnectedOperations\Logs.To view the health state of your appliance, use the management endpoint
Get-ApplianceHealthStatecmdlet. If you see this screen and the cmdlet reports no errors and all services report 100, open a support ticket from the Azure portal.
Install-Appliance fails
Update the appliance configuration and rerun the installation after failure.
For example:
If the IP address is already in use, modify the configuration object.
Here's an example to modify the ingress IP address
# Set a new IP address
$ingressNetworkConfiguration.IngressIpAddress = '192.168.0.115'
If
install-appliancefails during installation, update$installAzureLocalParamsand rerunInstall-applianceas described in Install and configure the appliance.If the appliance deployment succeeded and you're updating network configuration, see
Get-Help Set-Appliancefor the settings you can update post-deployment.
Next steps
This feature is available only in Azure Local 2602 or later.